How to create an Intersample Custom Field - Tip93
OBJECTIVE or GOAL
Welcome back to Get Empowered! In the last Empower tip-of-the-week post for Empower Chromatography Data Software, we learned how to create a single custom field to determine a sample pass/fail (Tip #92).
This week we will continue with our series on Custom Fields and learn how to create an Intersample Custom Field (Part 11).
Creating Custom Fields in Empower:
- #82: The basic steps on creating a Custom Field
- #83: How to create a Custom Sample Set Field
- #84: How to create a Component Custom Field
- #85: How to create a Peak Custom Field
- #86: How to copy a Custom Field from one project to another
- #87: How to modify a Custom Field
- #88: How to create a Result Custom Field
- #89: How to modify a Custom Field that applies to specific samples and/or specific peaks
- #90: How to use Empower to evaluate whether the sample meets specific criteria
- #92: How to create one custom field to determine a sample pass/fail
Recently I’ve received emails from some readers asking for tips on Intersample Custom Fields, particularly around summary functions. Let’s explore this topic starting with an understanding of what an Intersample Custom Field is and the syntax needed to make these calculations.
Tip #85 covered how to make a Simple Peak Custom Field. In that tip, we saw how to make a calculation for a peak in one chromatogram. What if we wanted to make a calculation involving a peak in one chromatogram and a peak in another chromatogram? That would be an Intersample Custom Field. (i.e., if I am monitoring a reaction and need to compare the peak area in the current batch to the peak area in a finished batch).
Let’s get started.
ENVIRONMENT
- Empower
PROCEDURE
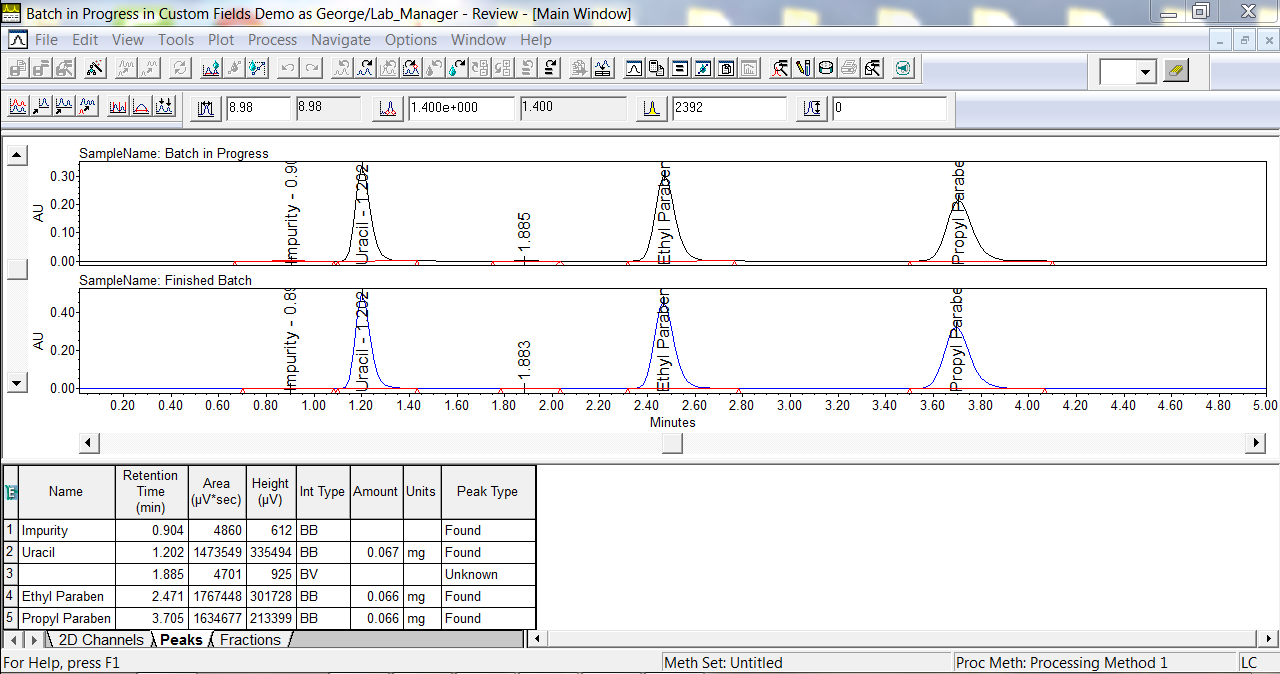
- We see an overlay (stack plot) of the batch in progress and a finished batch. Our SOP states that we must compare the area of the Ethyl Paraben peak of the batch in process to the area of the Ethyl Paraben peak in the finished batch.
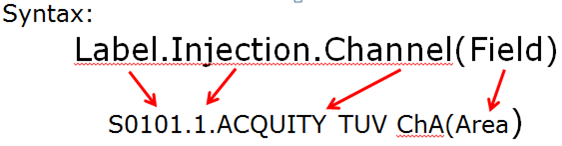
- The syntax for Intersample calculations is seen in the image below. The label and injection number come from the Sample Set Method. The channel is the channel of data we have collected. The field is the peak field of interest. We will explore some shortcuts you can take advantage of when using this syntax.
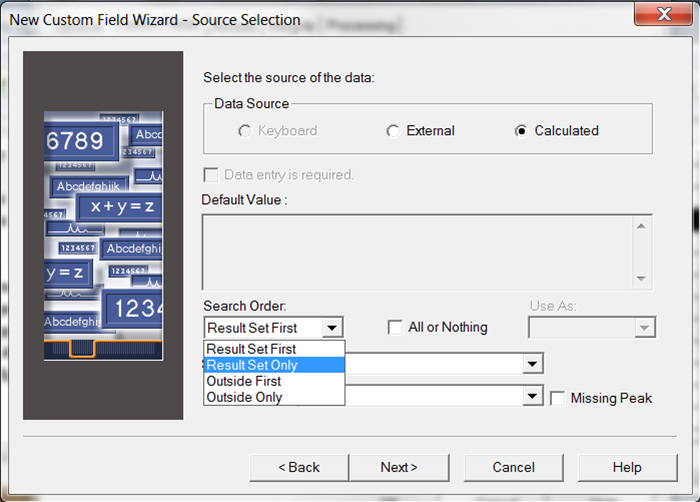
- Since we will use specific labels in the equation, we set the Search Order to Result Set Only. The reason for this is that we want to calculate the results from within the current Result Set and do not want Empower looking for older Results with the same label in the project.
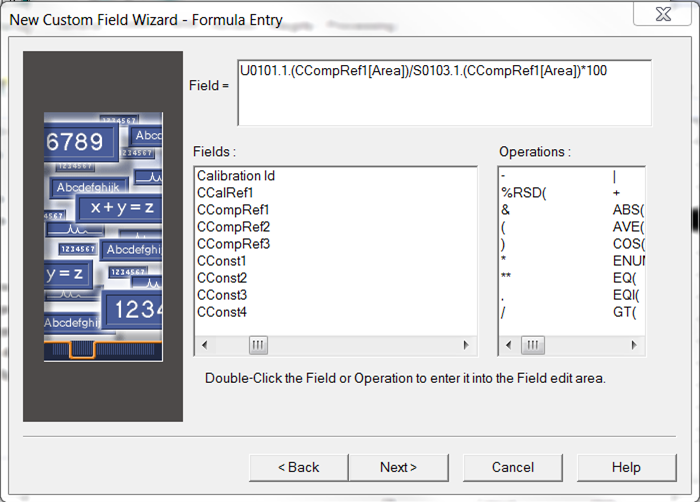
- The equation makes use of the syntax, dropping the channel, since it is the same channel of data throughout the Sample Set. That is one of the shortcuts we can take advantage of.
- We see the reaction is only 67% complete at this point in time.

It’s that easy!
ADDITIONAL INFORMATION
- This procedure can be followed using the QuickStart or Pro interface.
id68884, EMP2LIC, EMP2OPT, EMP2SW, EMP3GC, EMP3LIC, EMP3OPT, EMP3SW, EMPGC, EMPGPC, EMPLIC, EMPOWER2, EMPOWER3, EMPSW, SUP