How to install or uninstall a DESI XS source with HTL option - WKB254643
OBJECTIVE or GOAL
Install or uninstall a DESI XS source enclosure.
ENVIRONMENT
- DESI XS Source
- Synapt XS
- SELECT SERIES MRT
PROCEDURE
Installing the DESI XS Source
- Set instrument to Standby
- Open the vacuum tab on the Tune Page to monitor the backing pressure.
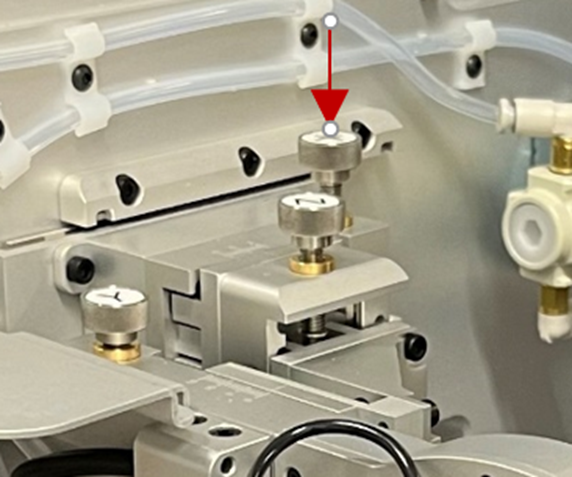
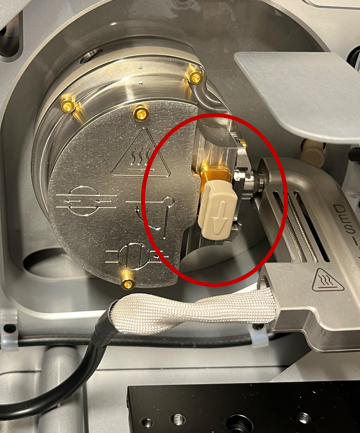
- Close the ion block isolation valve, remove the cone gas nozzle, and transfer the sample cone (including the O-ring) to the HTL (heated transfer line).
- Install the HTL, open the isolation valve, and directly check if the backing vacuum is approximately 3 mbar.
Note: If backing pressure exceeds 4.5 mbar, troubleshoot leakage around the sample cone. With the isolation valve closed, backing vacuum should be about 1 mbar or below.
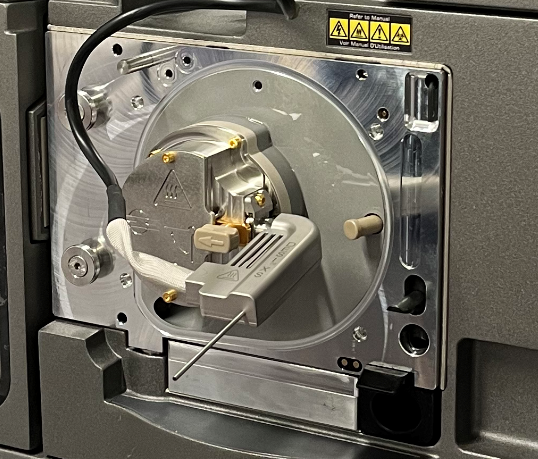
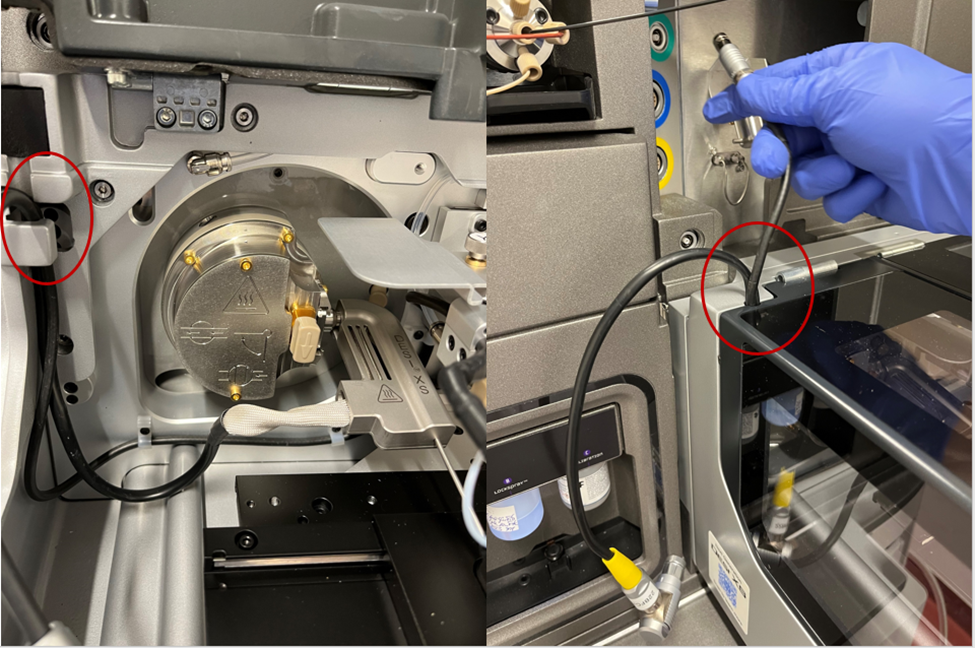
If backing pressure is acceptable, close the isolation valve again (otherwise touching the HTL in the next steps could cause a vacuum leakage and a subsequent crash vent). - Install the DESI XS source stage, guiding the HTL cable through ion block circle in the base plate.
Note: The base plate must move down by approximately 3 cm to be installed properly and securely held at the instrument.
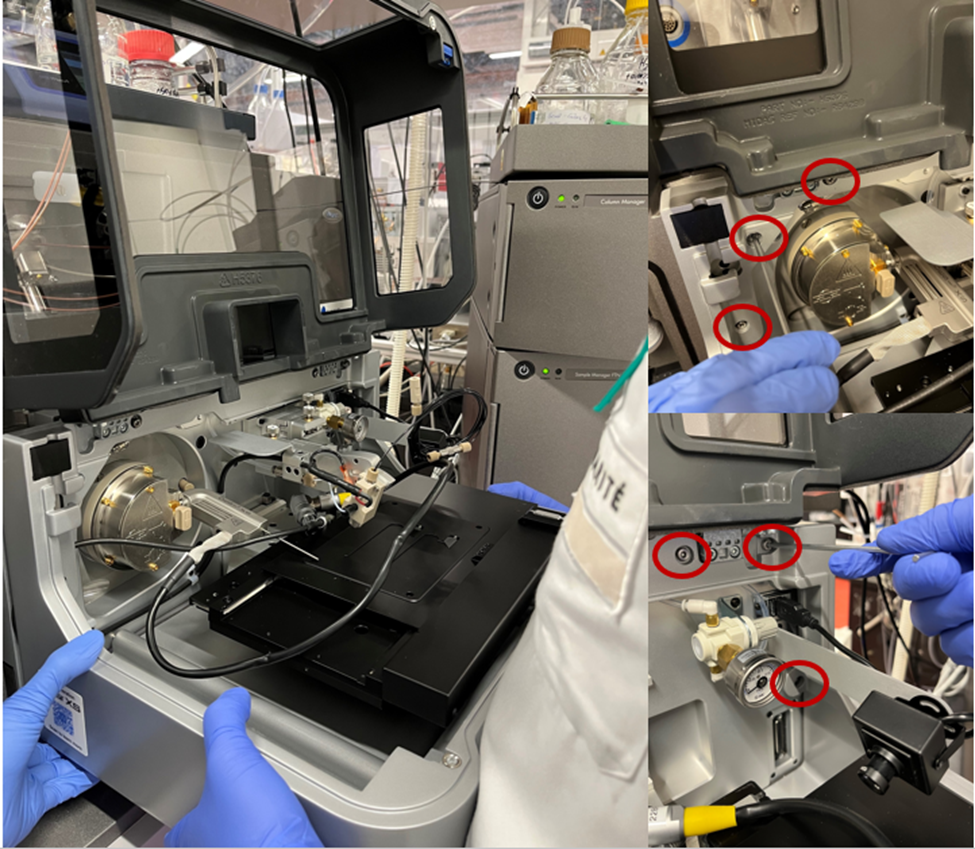
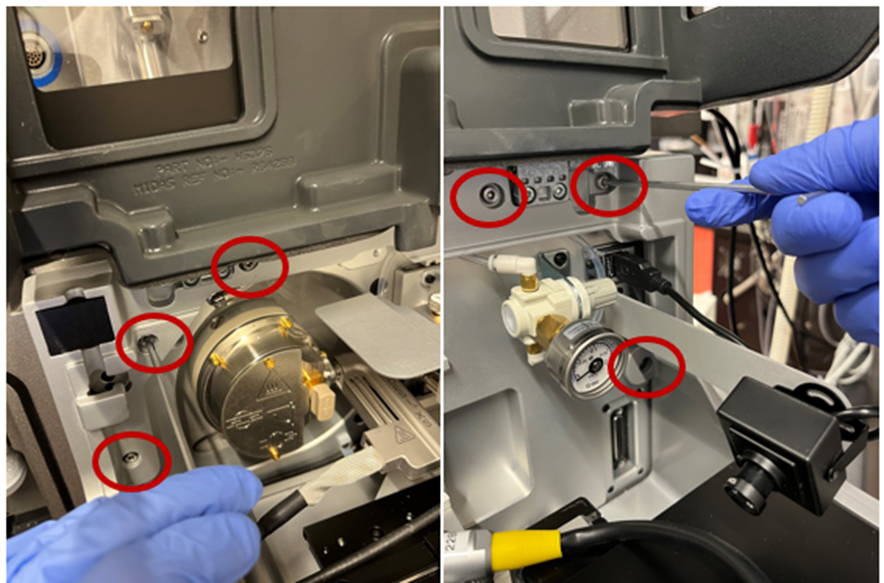
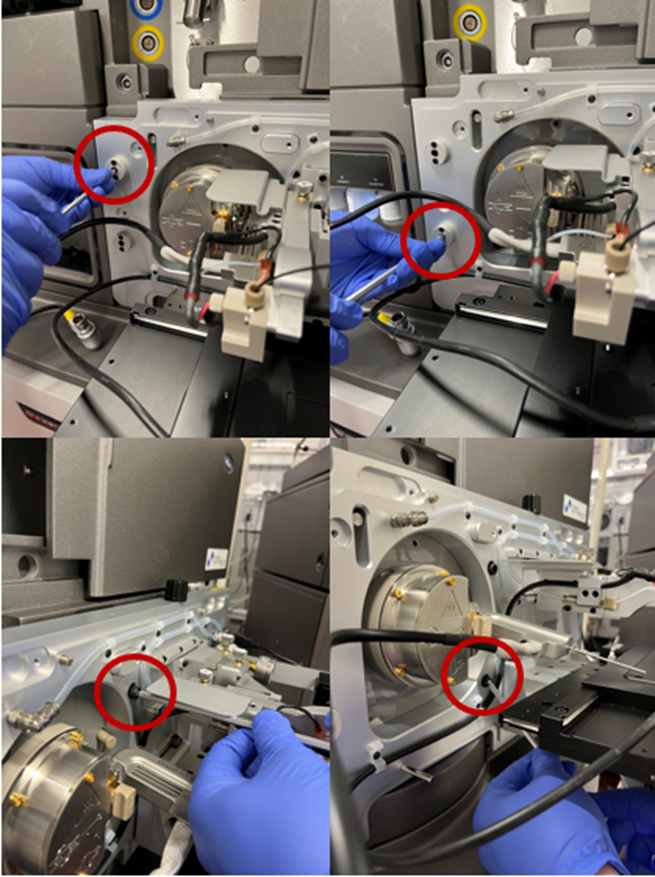
- Secure the DESI XS source base plate with the four 5-mm hex bolts.
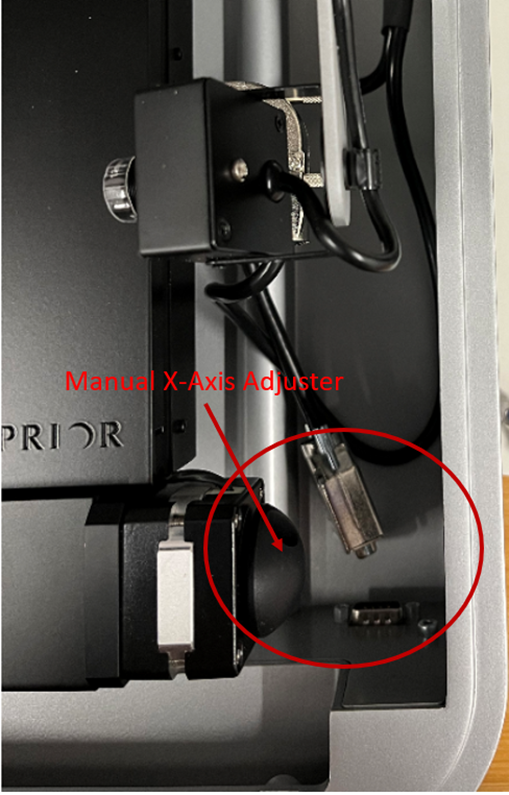
- If not yet done, lower the x axis adjustment for the sprayer as much as possible (in an upper position it could disturb the installation of the source cover in the next steps). The Sprayer should be positioned all the way to the right.
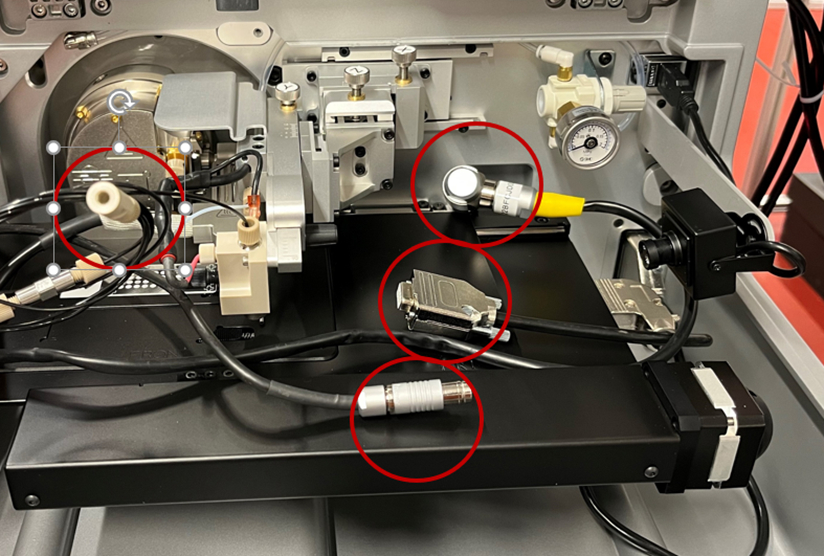
- Rest the HV cable (for capillary high voltage), the HTL cable (for source recognition), and the D-Type connector from the translation stage in the middle of the translation stage so that they do not disturb when installing the DESI XS source cover.
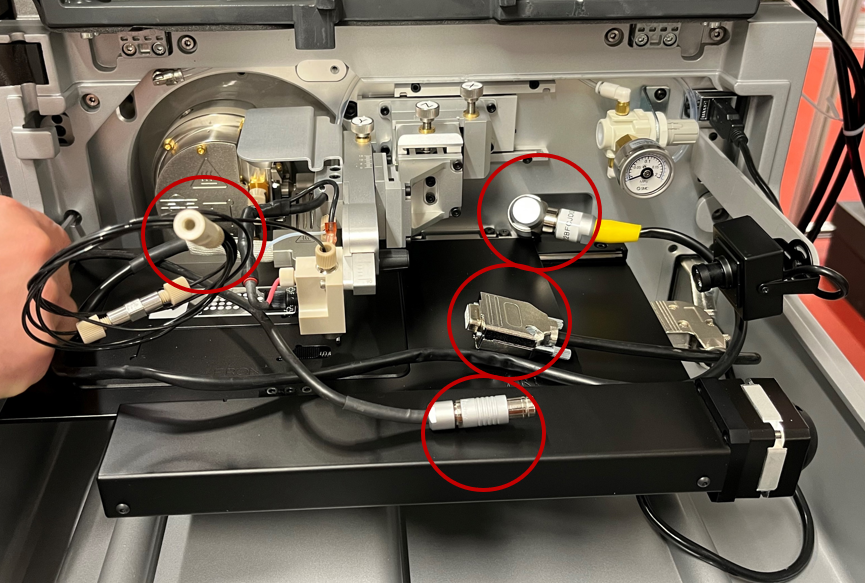
- Put the DESI XS source cover in place and secure it with the six 3-mm hex bolts.
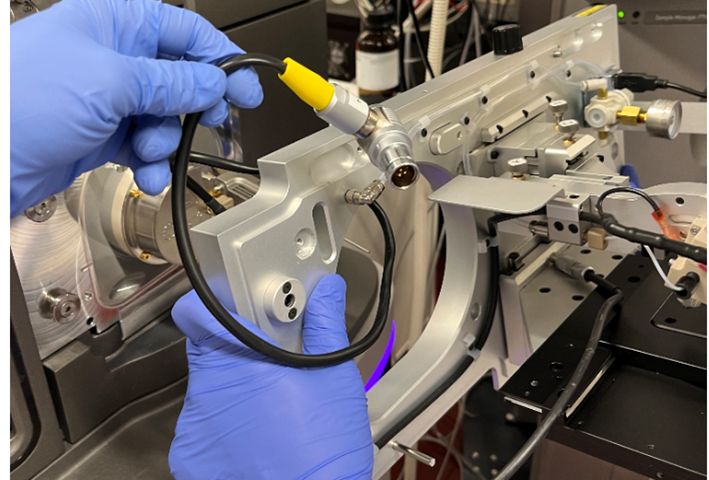
- Guide the HV and HTL cables at the left-hand side of the DESI XS source cover.
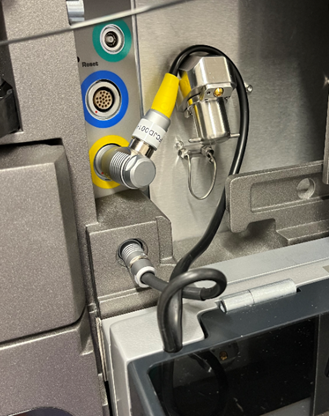
- Connect the yellow Fisher connector from the HTL and HV cables to the instrument.
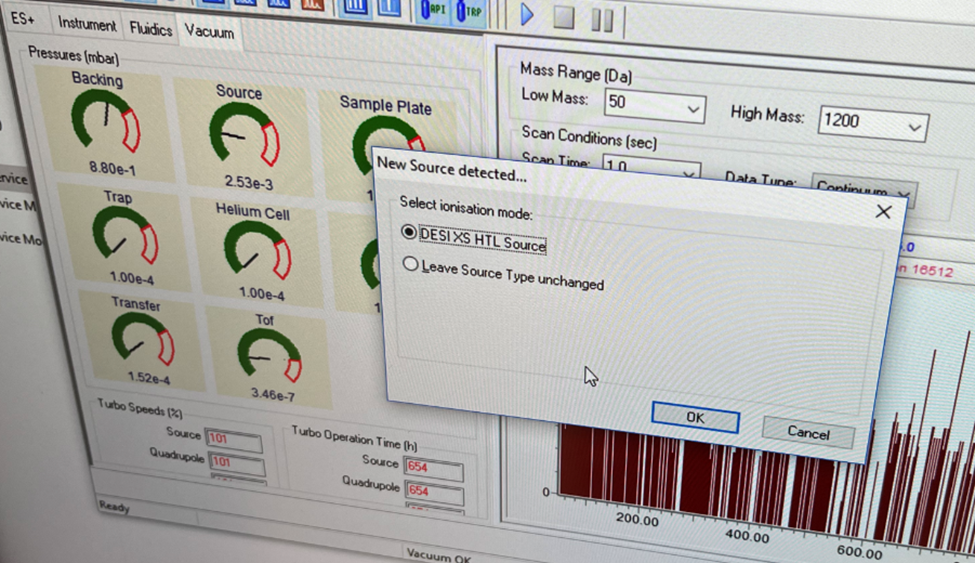
- When the DESI XS source cover is closed, so that the source interlock is defeated, the a Synapt XS will recognize the DESI XS source. Select it.
The Select series MRT in contrast will need to have all the other electrical connections described below connected, and source interlocks defeated before recognition takes place.
- Connect the big D-Type connector from the translation stage to the front of the DESI XS source cover.
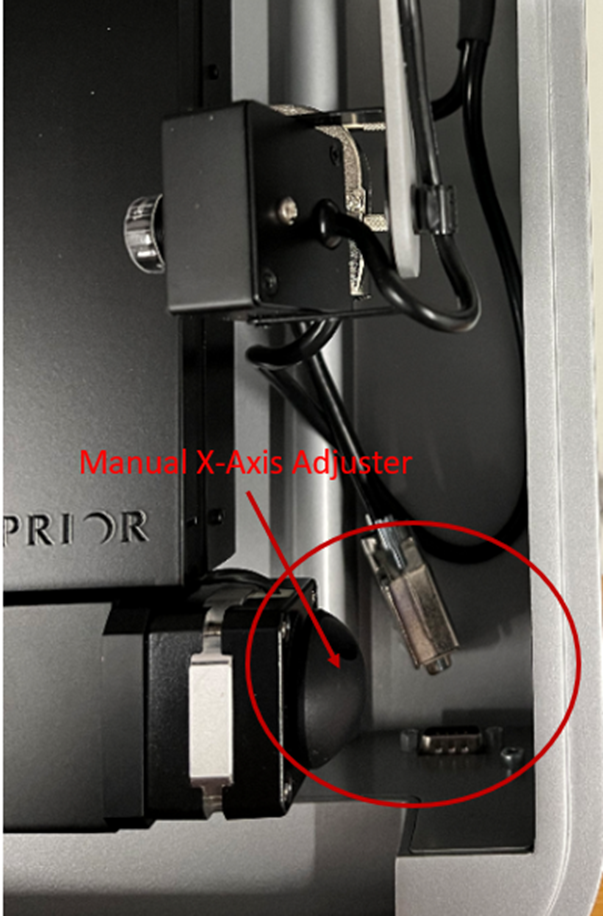
Tip: You can use the manual x axis adjuster to move the translation stage if required.
-
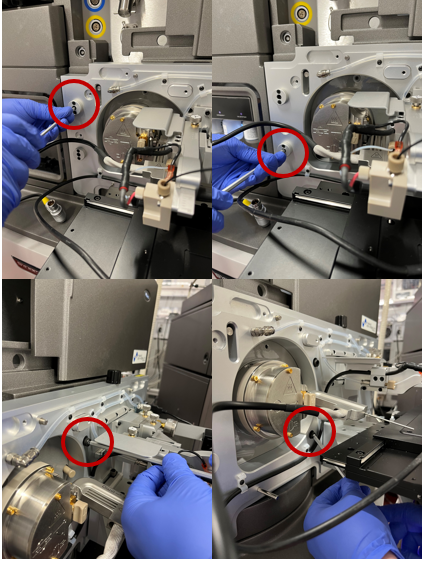
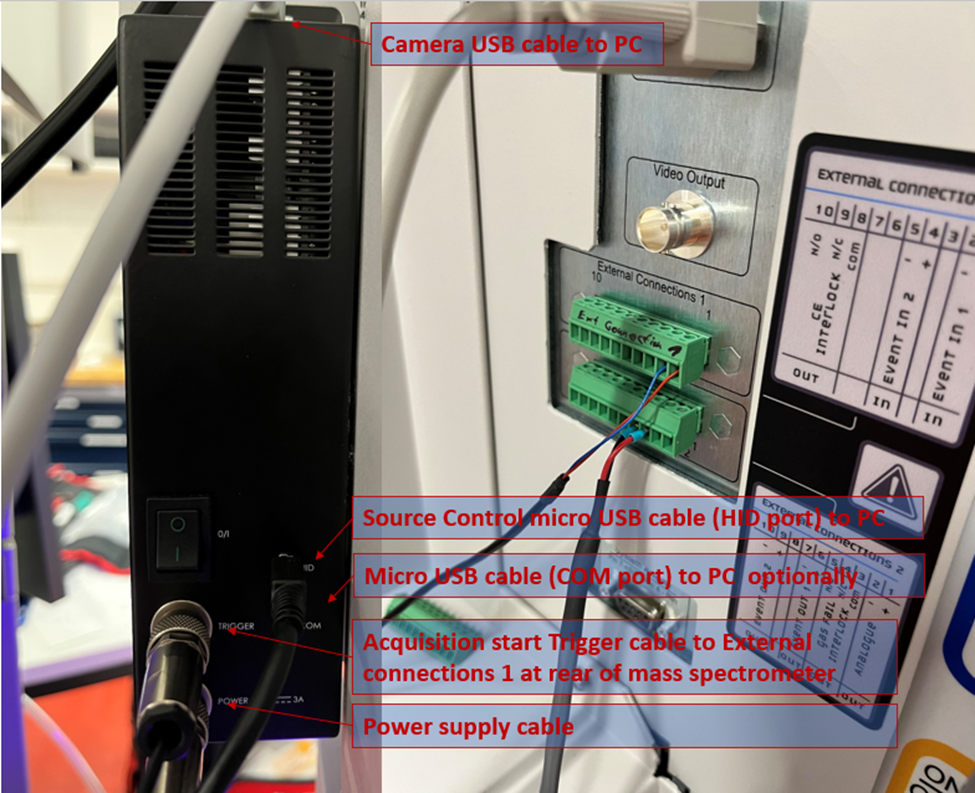
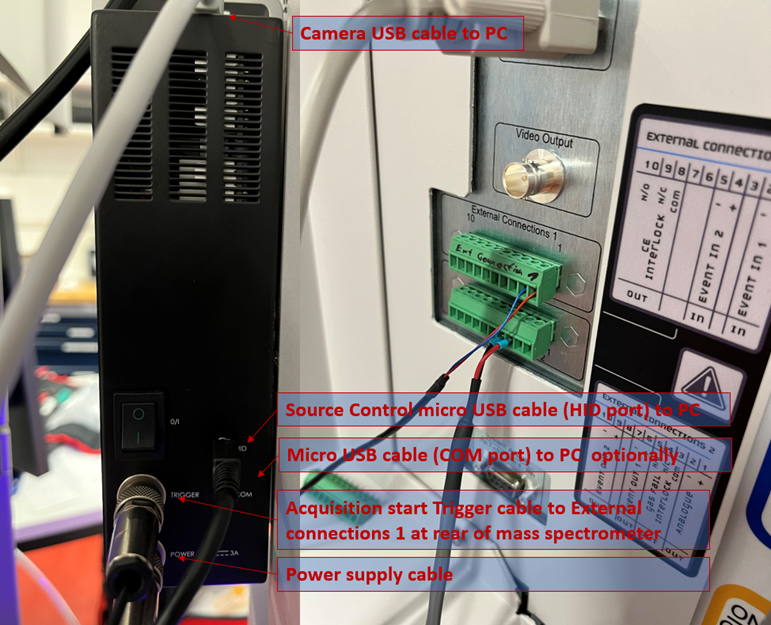
At the rear of the DESI XS source controller, connect the following:
a) Power supply
b) Camera USB to PC
c) Trigger to connector 1 at translation stage
d) Communication cable HID-Port to PC
e) Optionally, COM cable to PC
-
Power-on the DESI XS source controller.
-
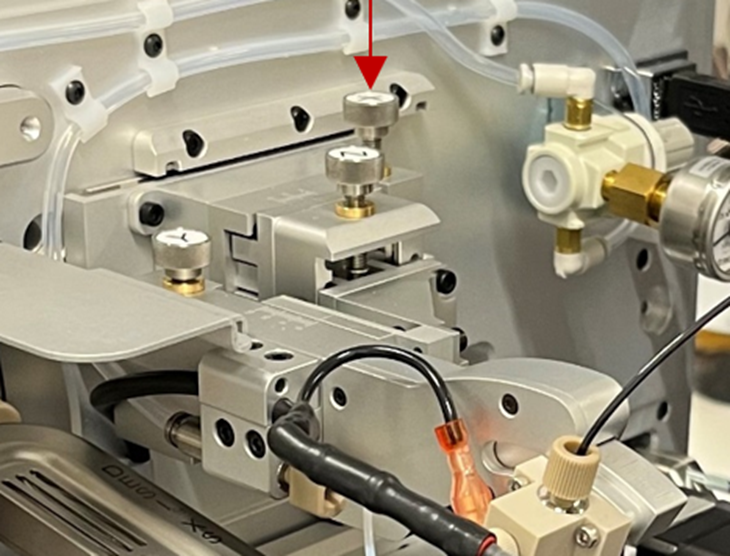
Open the isolation valve at the ion block and double check backing pressure.
-
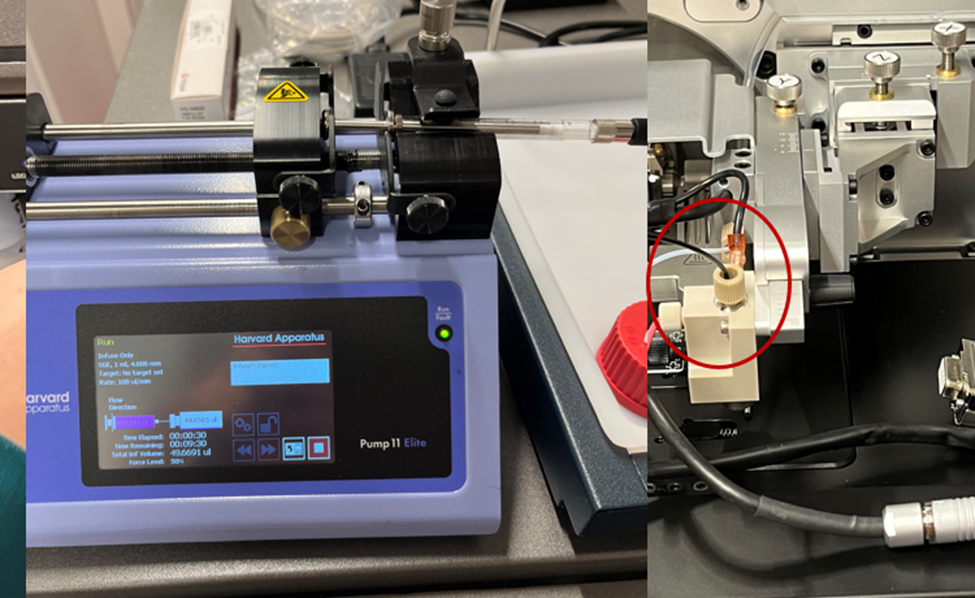
Install the syringe at the external syringe pump (usually a 1-mL Scientific Glass Engineering syringe with ID of 4.606 mm) and connect it to the high-performance sprayer.
Uninstalling the DESI XS Source
- Switch instrument to standby.
- With software control. Drive the Translation Stage (black table) to the lower-left position to allow access to the D-Type connector (reference point 5) and to keep the DESI stage away from the isolation valve.
- Close the isolation valve at the ion block to minimize the risk of a crash vent.
- Lower the sprayer x axis adjuster as much as possible (it could later disturb removal of the source cover).
- Lower the translation stage as much as possible.
-
Disconnect the following:
a) HTL cable
b) HV cable
c) Fluidics (at LuerLock – at sample syringe of external syringe pump)
and put everything to the middle of the translation stage.
-
Undo the D-Type connector at the front-right of source and put it to the middle of the translation stage.
-
Remove the following:
a) Power cable
b) HID cable
c) Camera cable
d) Trigger cable
e) COM cable (if connected)
-
Undo the six 3-mm hex bolts and remove the cover.
-
Undo the four 5-mm hex bolts that hold the DESI XS source.
Tip: You can slide the entire sprayer XYZ assembly to the right.
-
Remove the DESI XS source.
-
Remove the HTL and transfer the sample cone (with O-ring) into the cone gas nozzle of the ESI source, if required.
-
Install the cone gas nozzle for the ESI source if intended.
ADDITIONAL INFORMATION
id254643, comms, DESI, DESIXS, Electrospray, MRT, SYNAPTXS