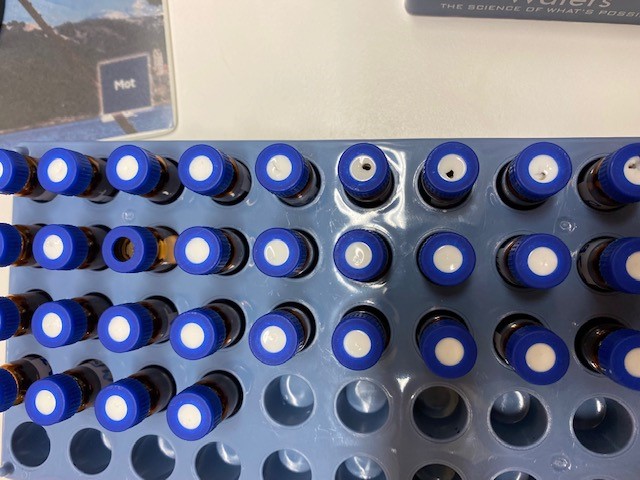
Alliance 2695 needle pushes septa into vial - WKB27177
Article number: 27177
SYMPTOMS
- Needle pushes pre-slit septa into vial

ENVIRONMENT
- 2695 Separations Module
CAUSE
Worn needle not puncturing the vial caps properly.
FIX or WORKAROUND
- Rebuild the injector using Seal Pack Rebuild Kit w/Needle (WAT271019)
- Power-off and disconnect the system from the electrical outlet.
- Remove the two screws that secure the right-hand panel.
- Remove the panel by sliding it to the rear and lowering.
- Using a 5/16-inch open-end wrench, remove the restricter loop fitting that is attached to the seal pack.
- Remove the two needle wash lines from the stainless steel connecting lines at the bottom of the injector.
- Loosen the two captive mounting screws that secure the injector to the compartment floor. Carefully hang the assembly over the side.
- Using two 5/16-inch open-end wrenches, disconnect the injector needle from the needle tee.
- Using a T10 Torx driver, loosen and remove the four screws that secure the seal pack to the base of the injector.
- Grasp the upper end of the needle and carefully withdraw the needle from the seal pack.
- Loosen and remove the four T10 Torx screws that hold the seal pack together.
- Remove the two yellow seals, the clear seal, and the wash tube.
- Replace the two yellow seals, the clear seal, and the wash tube with the new ones from the kit.
- Tighten the four T10 Torx screws to hold the seal pack together.
- Replace the lower frit and retainer.
- Remove the upper frit retainer and replace the spacer, filter, and upper frit.
- Lubricate the tip of the injector needle with 100% alcohol.
- Align the needle port with the scallop located on the underside of the seal pack, before sliding the seal pack onto the needle.
- Place the needle compression screw and ferrule onto the upper end of the needle.
- Align the four holes in the seal pack and the injector base, and insert the seal pack with needle into the injector base.
- Tighten the compression screw.
- Secure the seal pack to the injector base using the T10 Torx driver.
- Rotate the motor drive shaft to push the needle through the seal pack until the needle port is visible, and then verify that the needle port aligns with the scallop on the seal pack. If you need to readjust the needle port orientation, use the procedures above to remove the seal pack with needle and to replace the needle.
- Lower the injector so that its base seats in the compartment floor, and then secure it with the two captive screws.
- Reconnect the two needle wash lines. The needle wash in tubing is green. The needle wash out tubing is yellow or clear.
- Reconnect the restricter loop to the fitting attached to the shorter of the two stainless steel tubes.
- Reconnect the column fluidics line between the injector assembly and the column.
- Mount the side panel on the rear panel posts.
- Slide the side panel forward, aligning the red outlet tube with the slot in the side panel.
- Install the two screws on the side panel.
- Purge the injector and perform a seal calibration.
ADDITIONAL INFORMATION
See Section 7.6.3 (Rev. C) of the Alliance e2695 Separations Module Operator’s Guide.

