How to Use the Result Audit Viewer in Empower - Tip80
OBJECTIVE or GOAL
Welcome back to Get Empowered! In the last Empower tip-of-the-week post for Empower CDS Software, we wrapped up our reader question series and answered a question on how to calculate the height of the valley point between two fused peaks. (Tip #79)
This week we will begin a short series on the how to use the Result Audit Viewer in Empower.
When reviewing the audit trail information associated with a Result Set, we will look at a number of things including the Project Audit Trail, the Processing Method Audit Trail, and the Sample Set Audit Trail. The Result Audit Viewer makes it easier to review the audit trail information associated with a Result Set by bringing this information into one window rather than going to all of the individual audit trail windows. In this tip, we will take a tour of the Result Audit Viewer.
Let’s get started.
ENVIRONMENT
- Empower
PROCEDURE
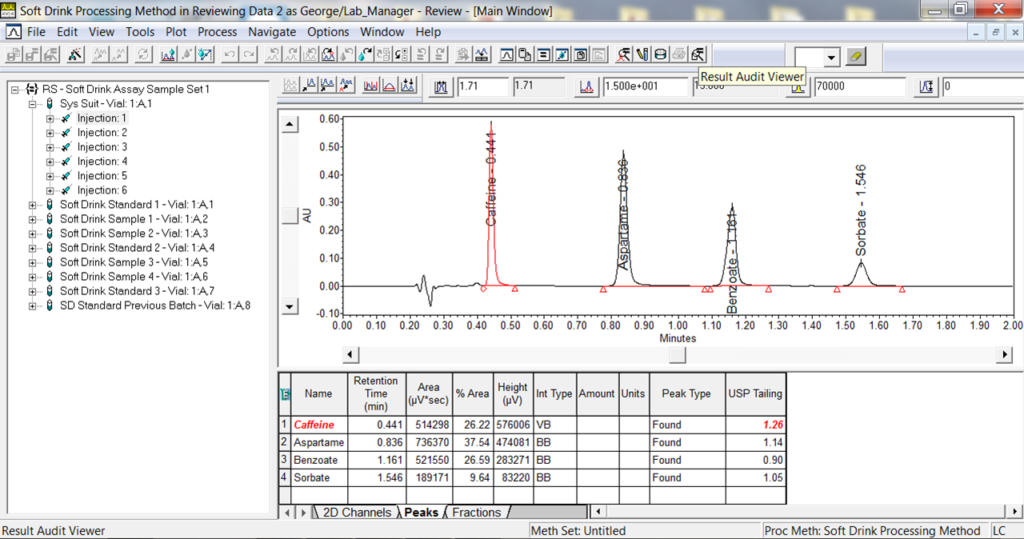
- We begin by bringing a Result Set into Review and click on the Result Audit Viewer tool.
- The Result Audit Viewer opens and the date field defaults to a date three months prior to the current one.
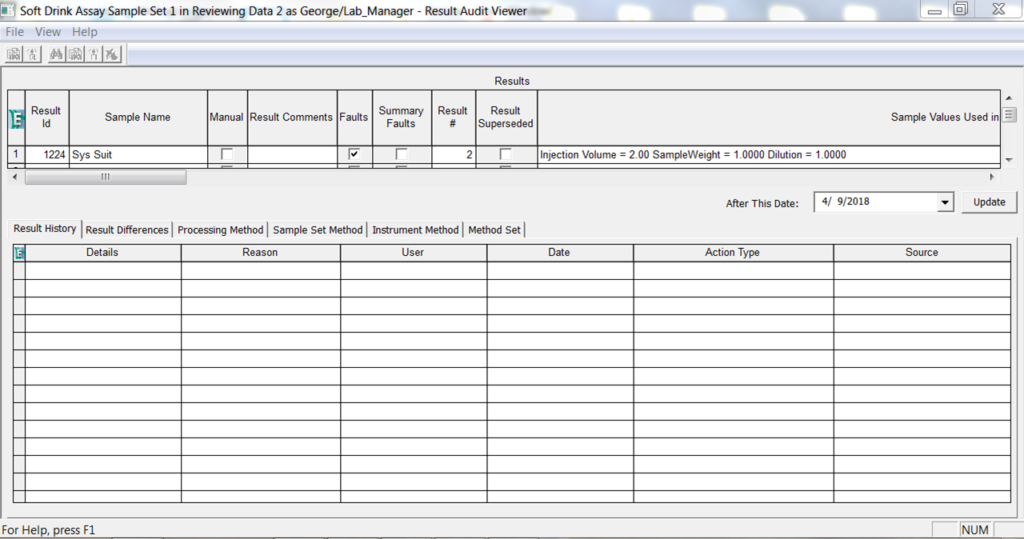
- Enter the date the data was collected and click Update to view the complete history of the data from the time it was collected until present day.

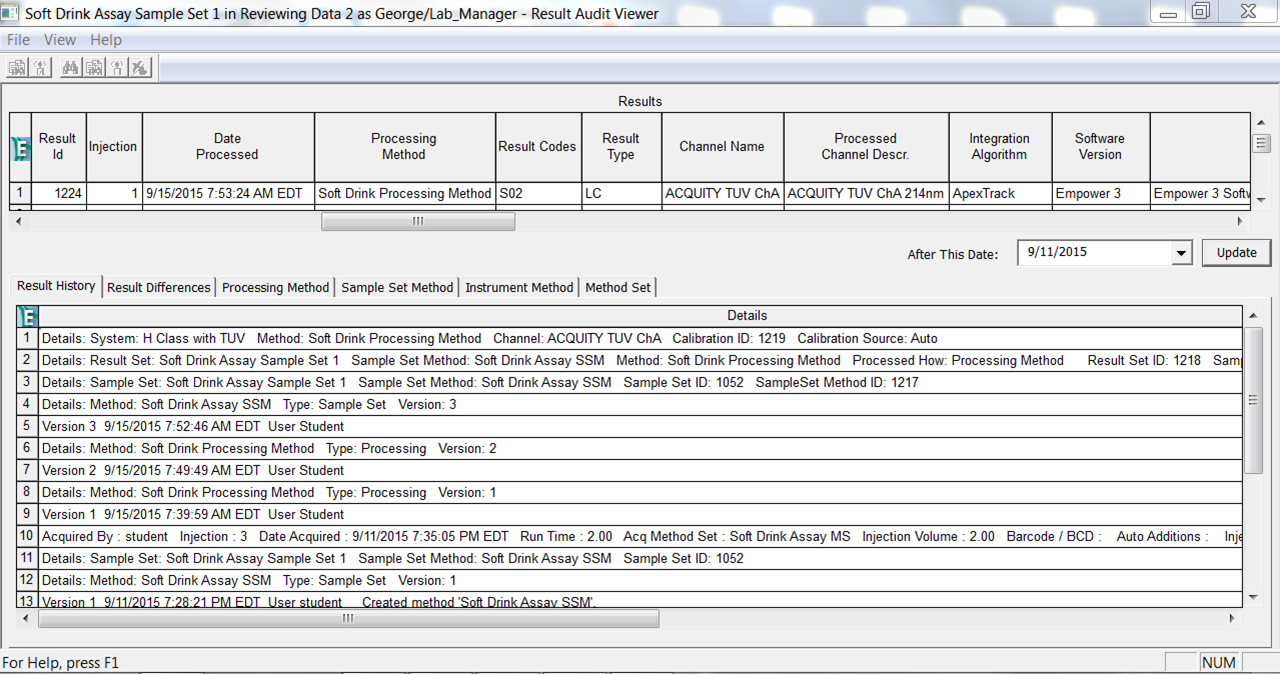
- The Results table provides a great deal of information about each result and if you scroll to the right you will see fields such as the Result ID, the Processing Method used to generate the result, the Processing Method ID, the Calibration ID, and so forth.
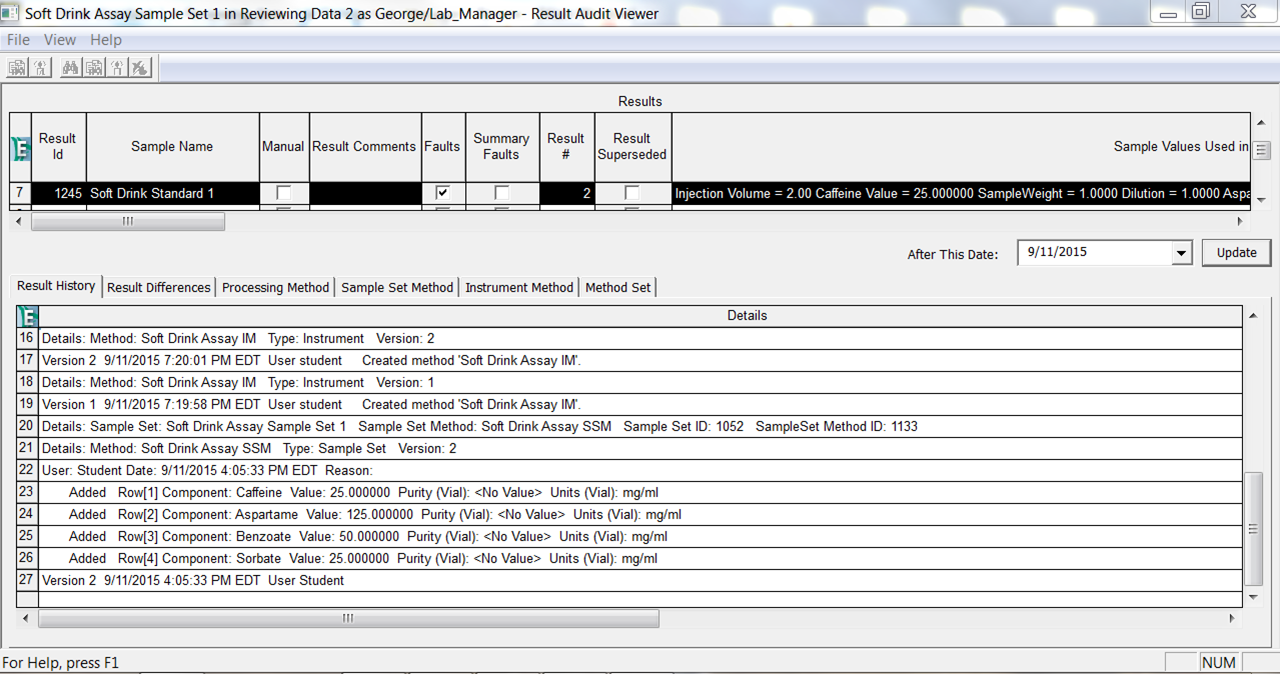
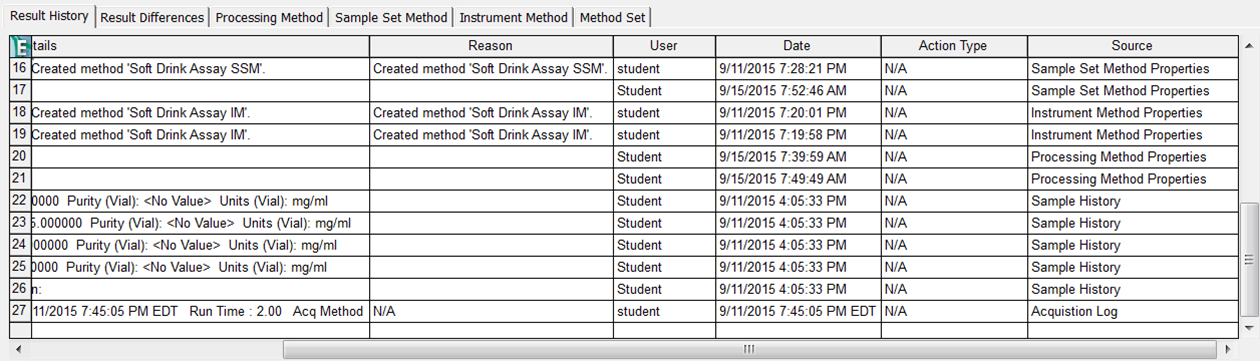
- If you highlight a Result in the Results table, the Result History table will display audit trail information for that result. For example, we see that the component values for the standard were added after the Sample Set was collected.
- If you scroll to the right in the Result History table, the Source field will display where the audit trail entry came from.
- Click the Processing Method tab and observe that there are two versions of this method. If you highlight both, the Method Differences table will display the differences between the two versions.
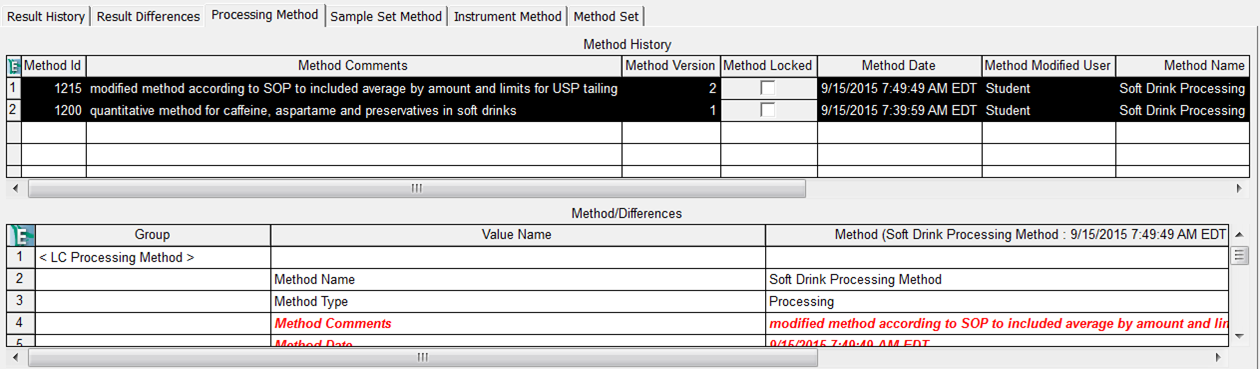
- We see that the highlighted result was generated using Processing Method ID 1215, which is version two of the method.
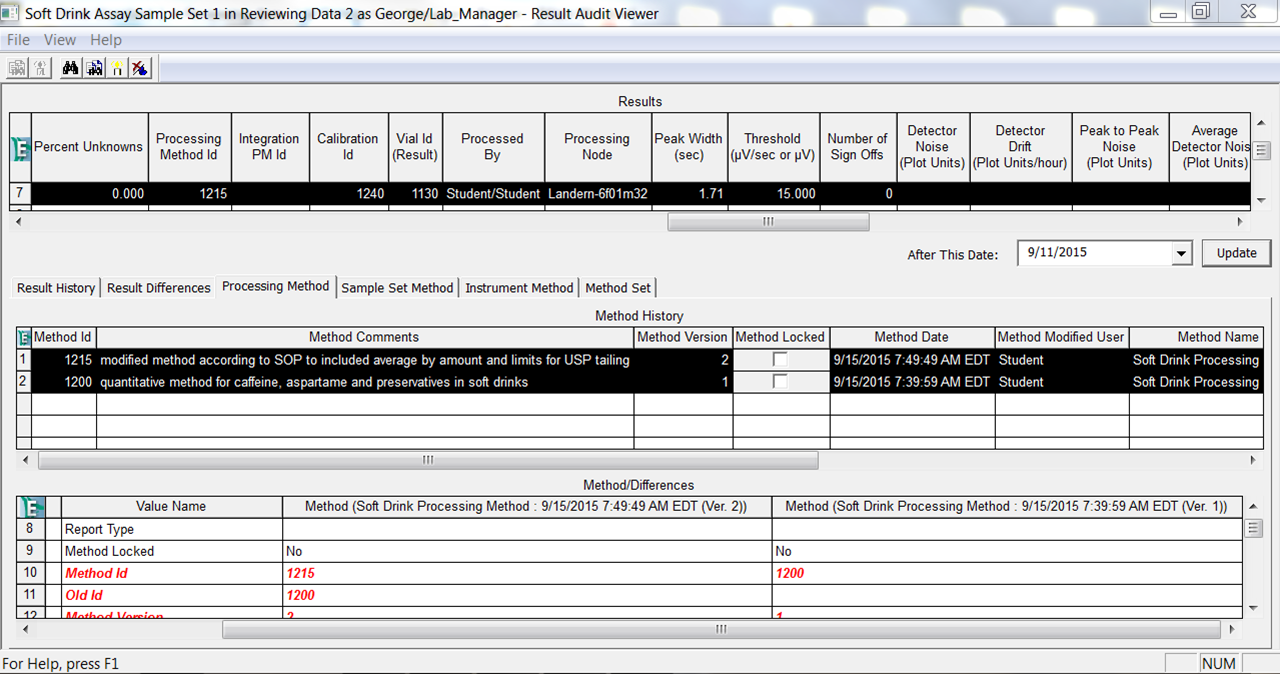
- Looking at the Method Differences table, we see the differences between these versions are highlighted in red. For example, in version one the Average By was set to None and in version two it is set to Amount.

It’s that easy!
ADDITIONAL INFORMATION
This procedure can be followed using the QuickStart or Pro interface.