How can I add my company logo in the Empower report method? - WKB2619
Article number: 2619
OBJECTIVE or GOAL
Add a custom company logo on the Empower 3 report method, replacing the Empower 3 logo.
ENVIRONMENT
- Empower 2
- Empower 3
PROCEDURE
- Click on Browse projects in Empower.
- Open Project and click on the Results tab.
- Highlight your result and right-click on preview/publisher.
- Choose the report method and, when the report publisher window opens, click "close".
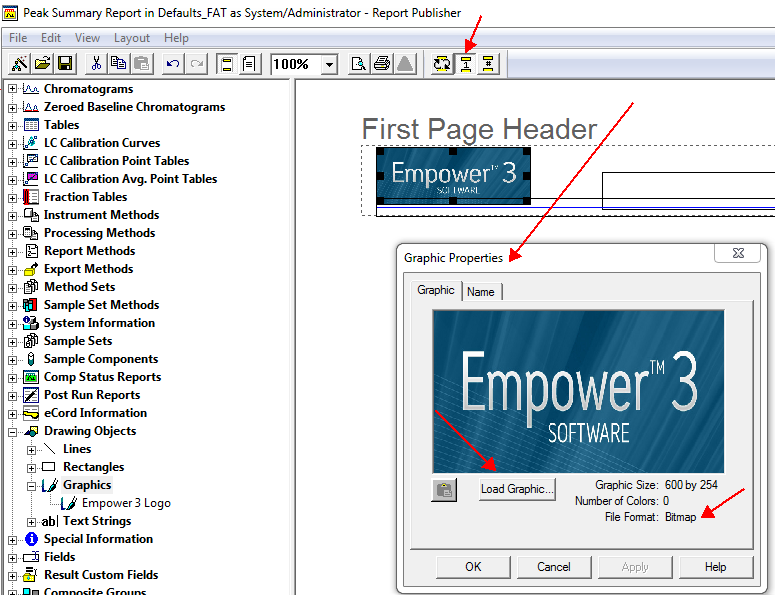
- Click on "View", and then click on "Header/Footer view".
- Click on the "First Page Header/Footer" icon (the icon that has the number "1" on it; see the screen shot below).
- Right-click on the existing Empower logo, click on "Ungroup", and delete the logo.
- Right-click on the header again and choose "Graphic Properties".
- Click on "Load Graphic" to load the Graphic of your choice (saved in bitmap file format).
- Save the report.
- To edit the logo in the remaining pages of the report select the "#"
ADDITIONAL INFORMATION
id2619, EMP2LIC, EMP2OPT, EMP2SW, EMP3GC, EMP3LIC, EMP3OPT, EMP3SW, EMPGC, EMPGPC, EMPLIC, EMPOWER2, EMPOWER3, EMPSW, SUP