Removing the StepWave assembly from the source assembly
Required materials
- Chemical-resistant, powder-free gloves
- Seal-breaker and locator tool
- StepWave assembly removal and insertion tool
Recommendation: When not in use, store the seal breaker and locator tool on the end of the StepWave assembly removal and insertion tool.
To remove the StepWave assembly from the source assembly:
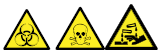
Warning: To avoid personal contamination with biologically hazardous, toxic, and corrosive materials, wear chemical-resistant, powder-free gloves when performing this procedure.
 Notice: To avoid damaging the StepWave ion guide assembly when removing it from the source assembly, use only these tools:
- Seal-breaker and locator tool
- StepWave assembly removal and insertion tool
- Position the seal breaker and locator tool so that it engages as follows:
- Its pin with the hole on the adaptor housing directly under the end of the StepWave ion guide assembly.
- Its lip behind the StepWave ion guide assembly’s ion guide cap.


- Push firmly on the seal breaker and locator tool’s handle, to lever the StepWave assembly slightly out of the adaptor housing.
Rationale: Moving the assembly in this manner releases it from a seal located inside the instrument.
- With the StepWave removal and insertion tool’s cutout uppermost, insert the tool’s pins into the ion block support screw holes above and below the aperture in the pumping block assembly.

Notice: To avoid damage when removing the StepWave ion guide assembly from the adapter housing, handle only the brown PEEK ion guide cap.
- Inserting your thumbs through the slots in the StepWave removal and insertion tool, pull the StepWave ion guide assembly from the pumping block assembly and into the StepWave removal and insertion tool.
Notice: To avoid damaging the StepWave ion guide assembly, handle it and its components carefully throughout the cleaning procedure. In particular, to avoid damaging the wiring on assemblies fitted with an externally wired printed circuit board (PCB), do not touch the wiring.
- Remove the StepWave ion guide assembly from the StepWave removal and insertion tool.
- Using both hands, fit the source enclosure to the two supporting studs on the source adaptor housing.
- Close the source enclosure.
Rationale: Fitting and closing the source enclosure prevents debris entering the instrument while you are working on the StepWave ion guide assembly.