Disassembling the StepWave ion guide assembly
Article number: 81125

Warning: To avoid personal contamination with biologically hazardous, toxic, and corrosive materials, wear chemical-resistant, powder-free gloves when performing this procedure.
Required materials
- Chemical-resistant, powder-free gloves
- Combined 2.5-mm hex wrench and cone extraction tool
- O-ring removal kit
To disassemble the StepWave ion guide assembly:
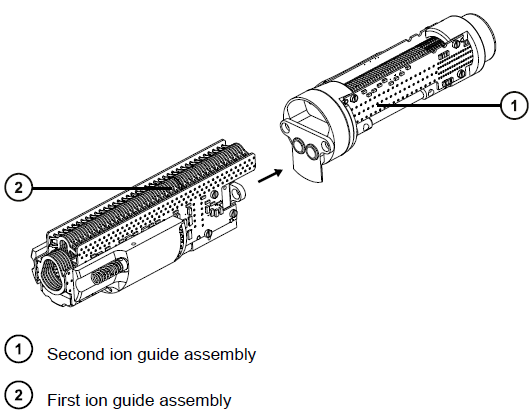
- Use the combined 2.5-mm hex wrench and cone extraction tool to remove the two screws securing the first ion guide assembly to the second ion guide assembly.


-
Separate the first and second ion guide assemblies.
- Remove the brown PEEK gasket from the second ion guide assembly.


- Remove the O-ring from the differential pumping aperture on the second ion guide assembly (see Removing O-rings and seals).

Warning: To avoid spreading contamination with biologically hazardous, toxic, and corrosive materials, dispose of all waste materials according to local environmental regulations.
- If the O-ring shows signs of deterioration or damage, dispose of it in accordance with local environmental regulations.
 Notice: To avoid misalignment of the StepWave ion guide, do not remove the differential pumping aperture or any further components from the assembly.