How to remove the QDa, RDa, or RADIAN ASAP pumping block - WKB52382
Article number: 52382
OBJECTIVE or GOAL
Removing the QDa pumping block (700009678), RDa, or RADIAN ASAP pumping block to clean the Stepwave and front-end optics.
ENVIRONMENT
- ACQUITY QDa Mass Detector
- ACQUITY RDa Detector
- RADIAN ASAP Direct Mass Detector
PROCEDURE
- Refer to the "Cleaning the source components" section in the Operators and Maintenance Guide for QDa, RDa, or RADIAN ASAP
- Obtain the Pumping block removal tool 700013840.
- Remove the Source Enclosure from the instrument
- Remove the sample cone.
- Use the 3 mm hex wrench to remove the four screws which secure the pumping block to the instrument
- Insert the Pumping block removal tool and carefully pull the pumping block
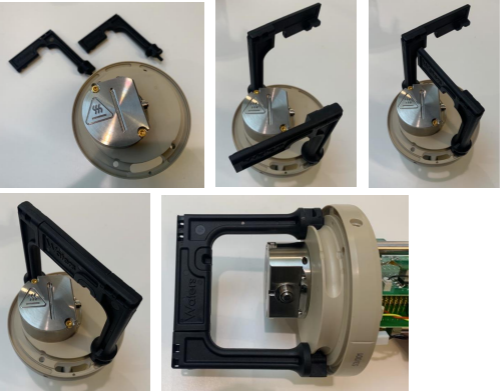
- Tip: If the pumping block sticks towards the gasket (seal), apply some around the edges of the pumping block.
- Wiggle the assembly free.
ADDITIONAL INFORMATION
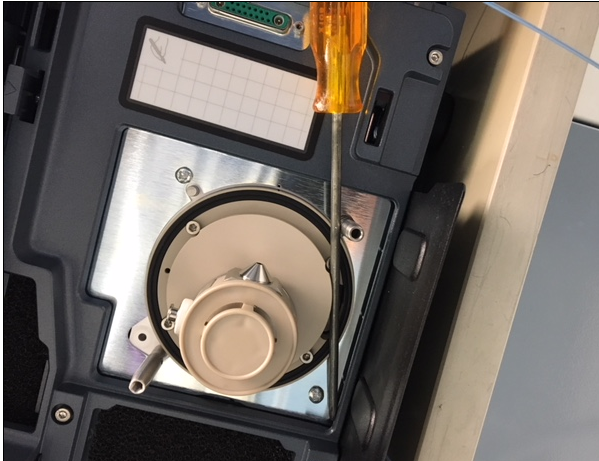
If the pumping block removal tool is unavailable, a long-handle screwdriver can be used to provide leverage
- Place a long-handle screwdriver in the preformed grove on the pumping block.
- Brace the end of the screwdriver on the front panel.
- With leverage, carefully wiggle the pumping block to free it from theinstrument.
- Attention:
Don't insert tools in between the pumping block and the gasket (seal). It will damage the gasket.
Do not use the Ion Block as a gripping point or lever to remove the pumping block. This can cause damage to the Ion block inserts which can lead to vacuum problems.