How to perform resolution setup and calibration for a Waters SQD2 mass detector using IntelliStart - WKB100031
OBJECTIVE or GOAL
Perform resolution setup and calibration for a Waters SQD2 mass detector using IntelliStart.
ENVIRONMENT
- MassLynx
- SQ Detector 2
PROCEDURE
Perform instrument resolution setup and calibration for unit mass Resolution mode in both Positive and Negative ion modes:
In preparation:
a. Set the initial horizontal position of the probe by setting the Vernier screw on the top of the source housing (X) to 5.
b. Set the initial vertical position of the probe by setting the collar on the top of the probe (Z) to 7 on the Vernier scale.
c. Set the capillary position so that approximately 0.5 mm is visible at the probe tip.
1. Click the MS Console icon on the main MassLynx page.
2. Prime fluidics wash line with a solution of 70:30 acetonitrile/water, and then place a bottle of calibration solution (sodium iodide/cesium iodide; part 700006006-3) onto fluidics reservoir B and confirm that the sample line was purged twice.
3. Switch on the API gas.
4. Place the instrument in Operate.
5. Click the IntelliStart menu.
6. Specify the instrument resolution, ion polarity, and instrument calibration options by
selecting the relevant check boxes as shown in Figure 34.
NOTE: Instrument setup options must be selected to access the Instrument Resolution and Instrument Calibration options.
7. Click Start.
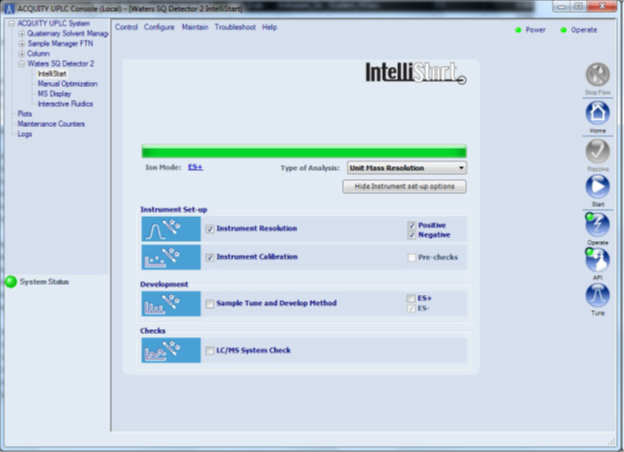
Figure 34 - Specifying IntelliStart instrument setup options
8. Set up the following parameters in the IntelliStart Setup Parameters dialog:
Analysis type Unit Mass Resolution
Calibration/Resolution Reservoir B
Keep the HTML check box selected.
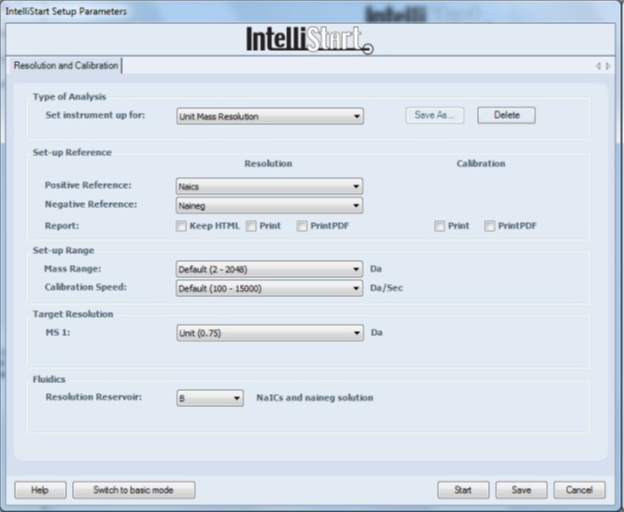
Figure 35 - Specifying the IntelliStart parameters
CAUTION: If no printer is installed, ensure that the Print Calibration Report
check box is clear. Print PDF must only be selected if
Adobe Pro is loaded on the host PC.
9. Click Start to begin the IntelliStart optimization.
10. Ensure that the procedure completes successfully (signified by check marks appearing in the Instrument Setup icons) (Figure 36).
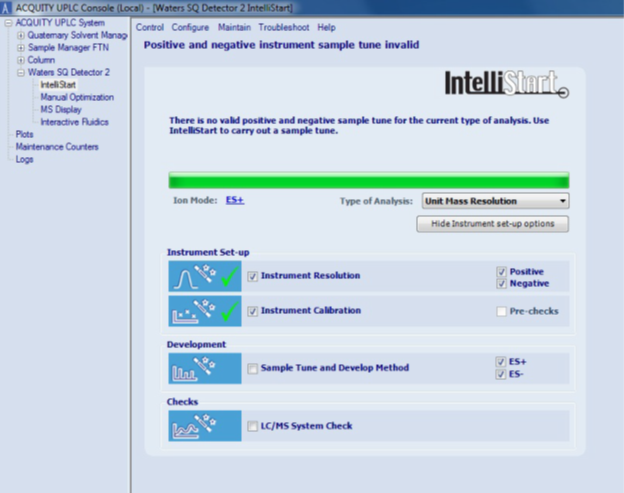
Figure 36 - Successful completion of IntelliStart resolution and calibration
11. Complete instrument resolution and calibration for all analysis types, as described in the relevant installation checklist.
NOTE: Calibration files created by IntelliStart are stored in the C:\MassLynx\IntelliStart\Results folder in a subdirectory named for the type of analysis (for example, Unit Mass Resolution).
ADDITIONAL INFORMATION