How to run the set pressure diagnostic on an ACQUITY M-Class System - WKB9063
Article number: 9063
OBJECTIVE or GOAL
- Run the set pressure diagnostic to eliminate leaks up to the analytical column.
- This information uses the "pre-sensor" and "post-sensor" version of the test.
ENVIRONMENT
- ACQUITY M-Class
- nanoACQUITY with M-Class Driver Pack Installed
- Single pump trapping mode
PROCEDURE
- In the Console, go to the micro Binary Solvent Manager (uBSM) or Nano Binary Solvent Manager (nBSM).
- Pump at 50/50 for 20 minutes, and then stop the flow.
- Select Troubleshoot > Set Pressure Diagnostic.
'Set Pressure Diagnostic' dialog for Driver Pack 2019 Release 2 (v1.74) and later:
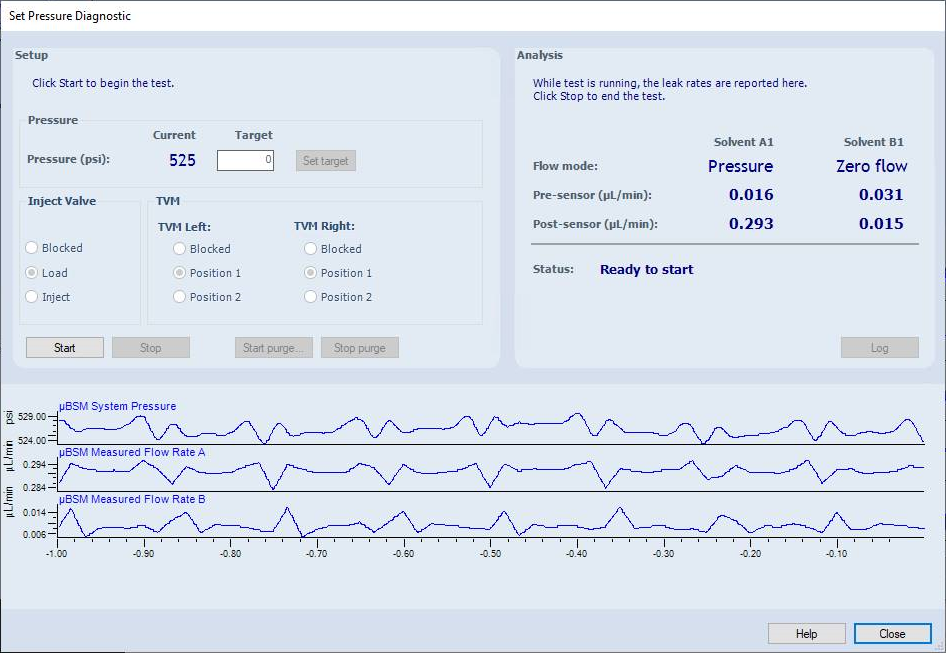
Note: The Set Pressure Diagnostic dialog in earlier versions of the software may differ slightly from the illustration above. However, the process for running the diagnostic is unchanged.
- Set the Inject Valve to Blocked.
- Click Start, set the Target pressure to 5000, and select 'Set' ('Set target' in the latest software).
- Wait a minute, and then set it to 9000 for a nanoACQUITY or 10000 for an M-Class.
- Wait another minute, and then set the Target pressure to 14000 for an M-class (remain at 9000 for a nanoACQUITY).
- After two minutes, observe the Post-sensor reading for A1. It should be less than 0.020 uL/min (and green in most but not all ICOP versions).
- Select Stop if it is green. If it is red, then marginally tighten one end of the line that goes from the uBSM or nBSM to the inject valve. If this fails to result in a green value, stop and pin plug at the flow controller with the PEEK pin plug. If the A1 post sensor value is now green, the pump is fine and the line between the pump and the inject valve may need to be replaced. If it is still red, run the static decay test on both the A and B pumps.
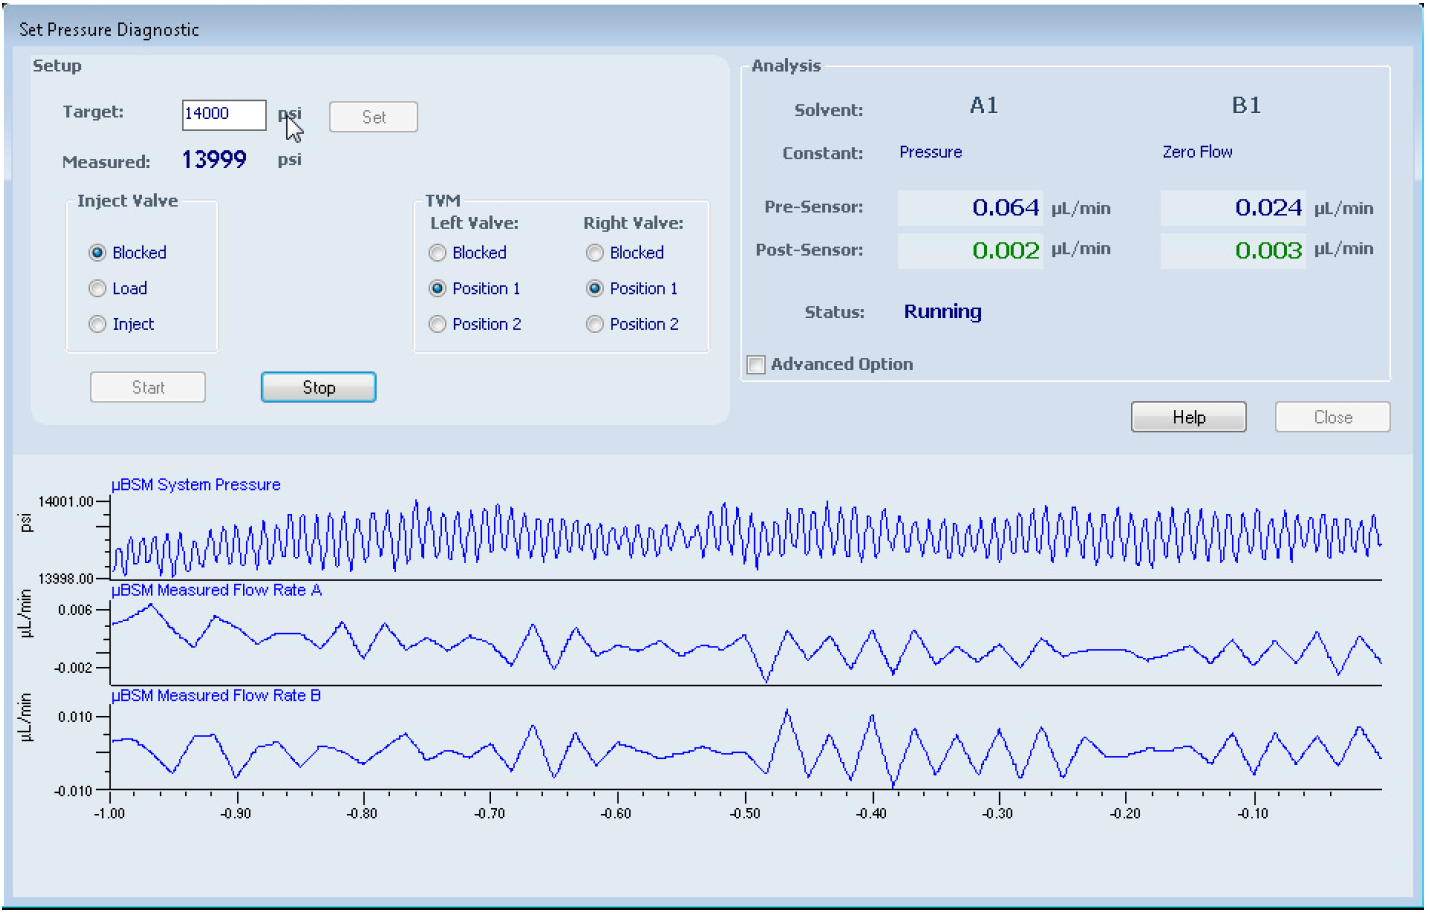
'Set Pressure Diagnostic' dialog for earlier versions of the software (before Driver Pack 2019 Release 2):
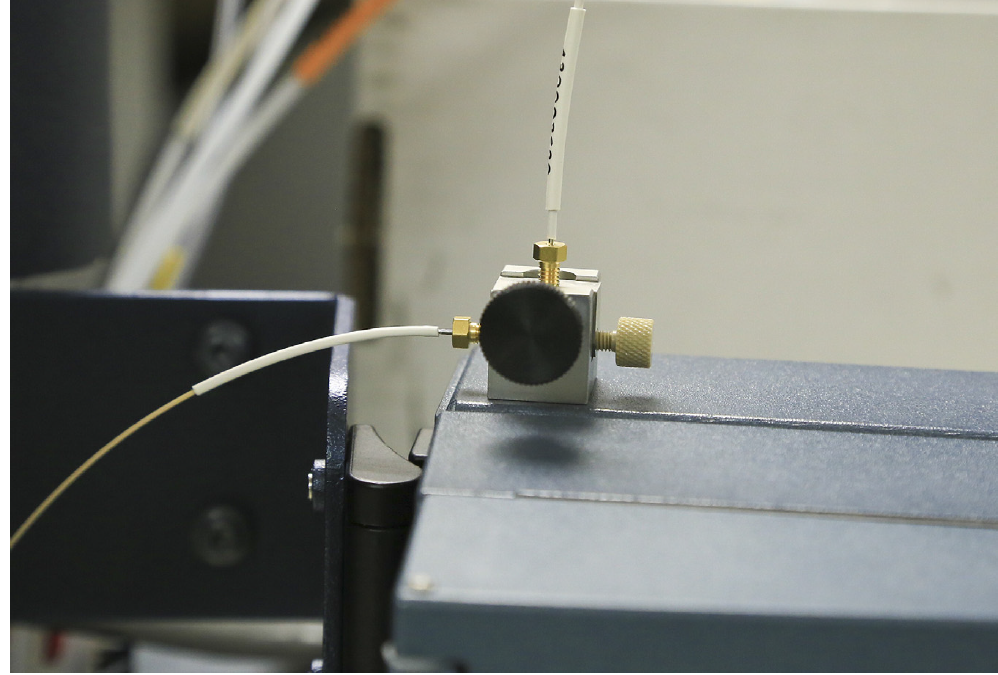
- Once the test passes to the inject valve, exit Set Pressure Diagnostic. Remove the analytical column and pump at 20 uL/min 50/50 A/B until you see solvent coming out of the nano-T.
- Stop the flow, wait a few minutes, and then pin plug the nano-T with the PEEK pin plug.
- Select Troubleshoot > Set Pressure Diagnostic.
- Set the inject valve to Load and ramp up to a Target of 9000 for a nanoACQUITY and 14000 for an M-Class.
- Wait two minutes for the pressure to stabilize. If the A1 post sensor value is red, tighten the trap column at the inject valve first. Then, if necessary, try the waste line at the Trap valve. Then try the PEEK pin plug. Then try the trap column at the T. Finally, try the waste line at the T. If one of the spots gives a big jump, give it a few minutes to stabilize. If it is still not green, then try that spot again.
ADDITIONAL INFORMATION
Recommendation: Run the set pressure diagnostics up to the T every time the analytical column is changed.
N.B. The pre-sensor leak rate needs to be below 200 nL/min (0.200 uL/min). If it is higher then run the static decay test. If that passes, then it is likely a leak between the vent valve and the input of the flow sensors, usually the in-line HP filters.
id9063, UPMASM, UPMBSM, UPMSMFL, UPNAYXPMP, UPNSAMMGR, UPNSOLMGR