How to disassemble an ACQUITY UPLC BSM Solvent Manager - WKB224364
OBJECTIVE or GOAL
Shut down and disassemble a Binary Solvent Manager for shipment to the repair center.
ENVIRONMENT
- ACQUITY UPLC
PROCEDURE
-
Wash the system with H2O for 20 minutes, and then wash the system with 2-propanol for 20 minutes.
-
Remove the solvent filter and tubings from the solvent bottles and put them into a plastic bag (do not disconnect from degasser).
- Close the control software and power-off all modules of the stack.
- Electrically unplug all UPLC modules. Mark and remove any cables (Ethernet, signal, I/O, events) from the modules.
(Marking the cables is important for reinstalling the system when the modules come back from repair. Photos of the cable and tubing are also helpful.) -
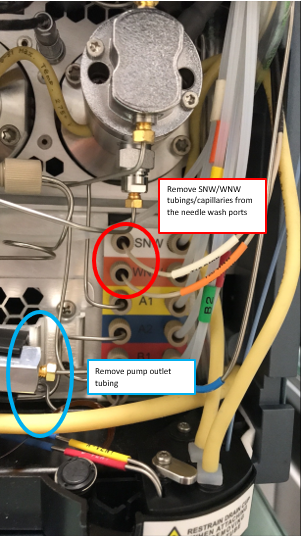
Remove fluidics connections: strong needle wash (SNW/white labeled PEEK tubing), weak needle wash (WNW/orange labeled PEEK tubing), and Pump Outlet (blue labeled steel capillary from mixer to Sample Manager).
-
Remove the waste tubings from the sample manager routed toward the solvent manager and leave them connected to the sample manager.

-
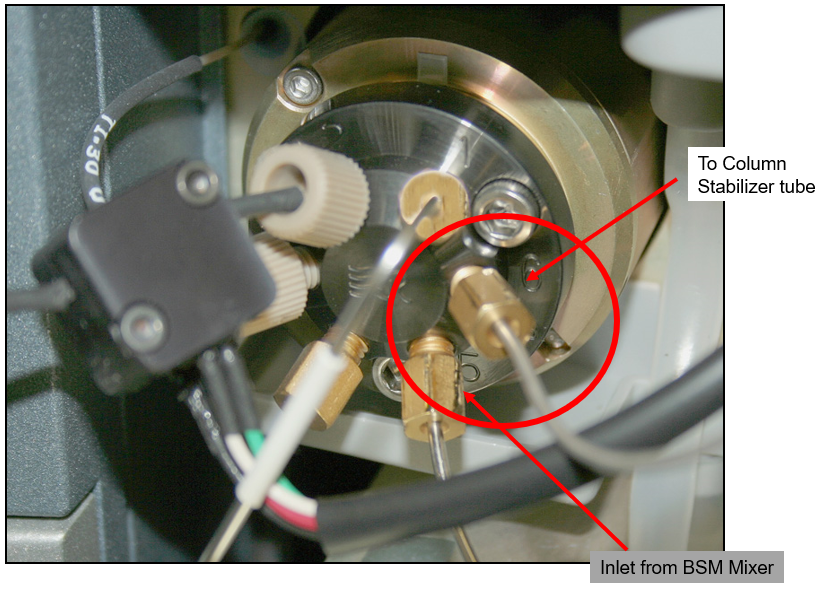
If a column manager is included in the system, disconnect the steel tubing from inject valve to column manager at port 6 of the inject valve.
-
Move the module to a suitable box for shipment. (If a box is not available, ask your local Waters office.)
- Fill and sign the latest revision of the Environmental Health and Safety document provided by Waters.
- Attach the signed EH&S document outside the box and send a PDF copy to the local Waters office.
- The Waters office arranges the shipment.
ADDITIONAL INFORMATION