How to disassemble an ACQUITY UPLC FTN Sample Manager - WKB120046
Article number: 120046
OBJECTIVE or GOAL
Shut down and disassemble a Sample Manager FTN for shipment to the repair center.
ENVIRONMENT
- ACQUITY UPLC Sample Manager - Flow Through Needle PLUS (SM-FTN PLUS)
- ACQUITY Arc Sample Manager FTN-R
PROCEDURE
- Wash the system with H2O for 20 minutes, and then wash the system with IPA for 20 minutes.
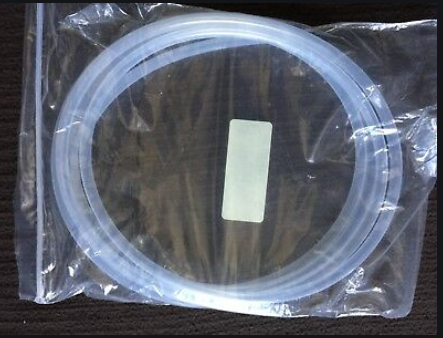
- Remove the sample plates from from the sample manager and remove the solvent filters from the solvent bottle and place them in a plastic bag (as shown below).
- Close the control software and power-off all modules on the stack.
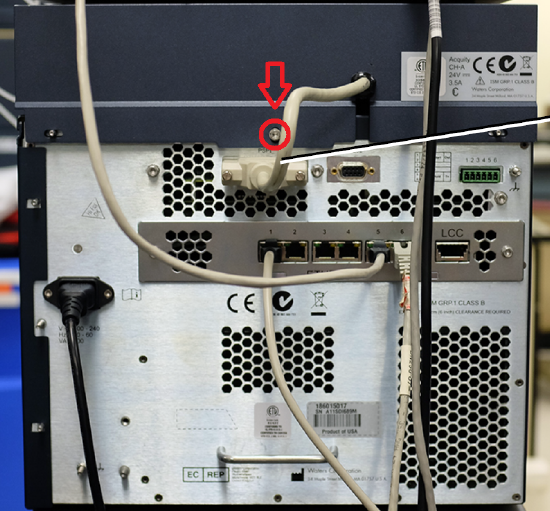
- Electrically unplug all UPLC modules and mark and remove any cables (Ethernet, signal, I/O, events) from the modules.
(Marking the cables is important for reinstalling the system when the modules come back from repair. Photos of the cable and tubing are also helpful.) - If there is a Column Heater single column, remove the screw from the rear and remove the Column Heater (see screw in the image below).
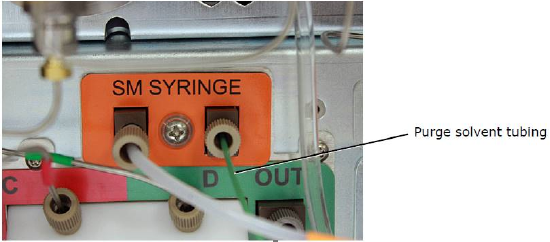
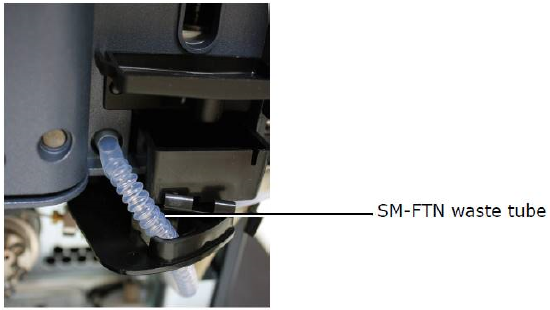
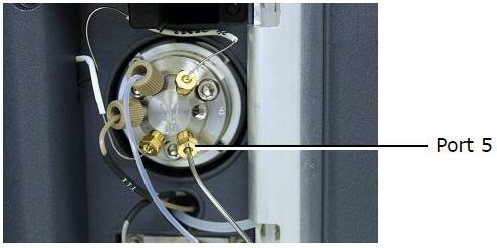
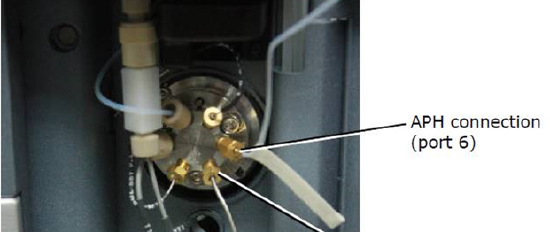
- Remove fluidics connections:
- Green PEEK tube, Purge solvent, on the Pump Module
- Syringe waste line, gray tube, on the Pump Module
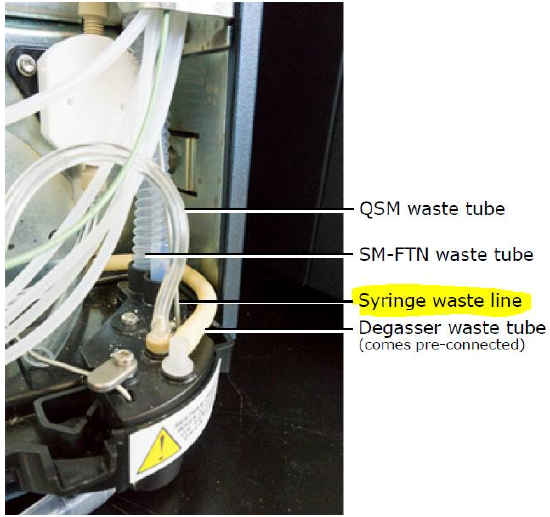
- Needle wash waste line (corrugated tube)
- Pump outlet tube (SS tube) on port 5
- Preheater tube (APH) on port 6
-
Move the module to a suitable box for shipment. (If a box is not available, ask your local Waters office.)
Note the dimensions and weight of the module to choose the right box:
ACQUITY UPLC FTN Sample Manager 34.3 cm X 71.1 cm X 27.3 cm, 25.9 kg -
Fill and sign the latest revision of H&S module provided by Waters.
-
Attach it to the box and send a PDF copy to the local Waters office.
-
The Waters office will contact you to arrange the shipment.
ADDITIONAL INFORMATION
To reinstall the module, attach all of the cables and tubes that were removed.