How to set up MSConvert with UNIFI 1.9.4 or waters_connect with UNIFI 1.9.9 or 1.9.12 - WKB78812
OBJECTIVE or GOAL
Interface MSConvert with UNIFI so that MSConvert can be used to export and convert data to different formats.
ENVIRONMENT
- UNIFI 1.9.4 (WebAPI 1.3)
- UNIFI 1.9.9 (PublicAPI 1.8)
- waters_connect with UNIFI 1.9.12 (PublicAPI 1.9)
- Proteowizard MSConvert
PROCEDURE
NOTE: This procedure is not applicable to waters_connect with UNIFI 1.9.13 and PublicAPI 1.10 or other more recent releases of waters_connect. Specific articles exist for other versions of waters_connect. Install the appropriate UNIFI API version for the version of UNIFI installed as described in the relevant release note.
- Install Proteowizard MSConvert.
- The installer can been downloaded from Sourceforge.
- In the Windows 10 search option, type About Your PC, open About Your PC, and make note of the PC name.
- This is MY_PC_NAME at step 17.
- In a Server system the API is installed on the server. In that case you need to find the fully qualified domain name of the server at this point and use that where it says MY-PC-NAME later in these instructions.
- Open UNIFI and log in with an Administrator account.
- In UNIFI Administration, select External Application Security Configuration.
- Log in to Waters UNIFI Client registration with a UNIFI administrator role.
- Click "New Client".
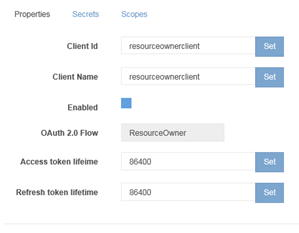
- In the Client Name field, specify resourceownerclient.
- In the Client ID field, specify resourceownerclient.
- In the OAuth 2.0 Flow field, select ResourceOwner from the drop-down options.
- Click the Create button.
- Click on the Edit Client button next to the resourceownerclient that you created in the previous steps.
- Select Properties, set the Access token Lifetime and Refresh to 86400, and select the Enabled check box.
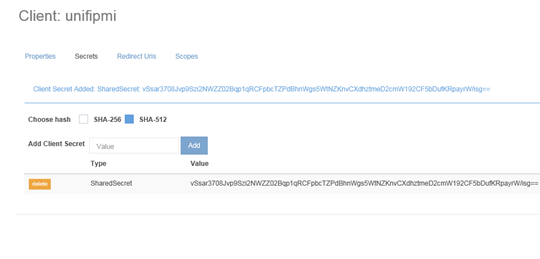
- Click on Secrets, set Client Hash to SHA-512, type "secret" in the value-field, and click the Add button next to the Add Client Secret box.
- Launch the MSConvert application on the UNIFI workstation by clicking on the icon in the Windows Start menu.
- Select “UNIFI” in “Browse Network resources”. This open the MS Convert UNIFI browser.
-
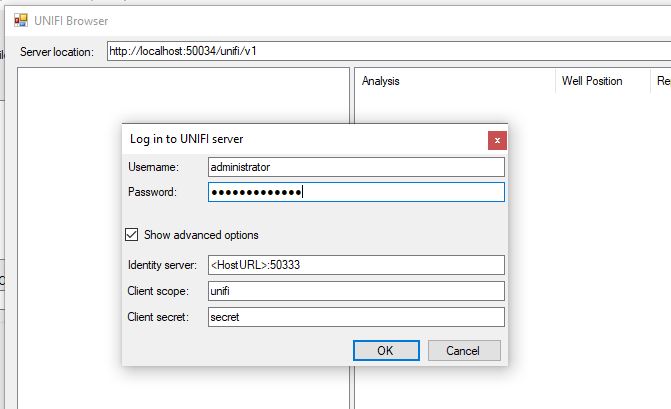
In the MSConvert UNIFI browser interface Server location field, type http://MY_PC_NAME:50034/unifi/v1.
-
HINT: You found MY_PC_NAME at step 3.
-
TIP: If MSConvert and UNIFI are on the same PC, you can use localhost instead of MY_PC_NAME.
-
NOTE: If TLS was enabled during API installation, use https in the location field (e.g., https://MY_PC_NAME:50034/unifi/v1).
-
-
Press Connect.
-
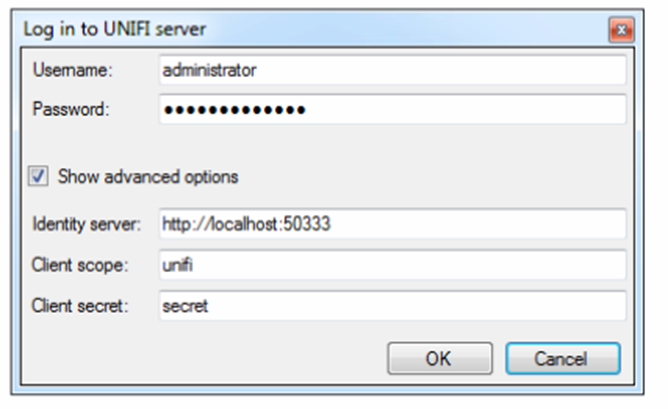
In the "Log in to UNIFI Server" pop-up window, specify the UNIFI administrator account username and password (by default, these will both be "administrator").
-
If the the version of MSConvert has a "Show advanced options" check box:
-
Select that check box.
-
If you are using API1.3 (UNIFI 1.9.4), API 1.8 (UNIFI 1.9.9), or API 1.9 (UNIFI 1.9.12), in the identity server field type http://MY_PC_NAME:50333, or https://localhost:50333 as shown below.
-
- NOTE: In recent versions of MSConvert (3.0.22 or later), the advanced options may auto-populate based on what you specify at step 17. If when you open advanced options they look like this, leave the advanced options alone and just specify the UNIFI username and password.
-
Press OK. Connection with the UNIFI database is established.
-
When you complete any work in the MSConvert UNIFI browser, click on the Disconnect button in the top-right of the window.
-
This logs out the Administrator.
-
Subsequent users should log in using their own UNIFI account name and password and log out by pressing the Disconnect button. This allows UNIFI to record each user's accesses of the UNIFI database through the MSConvert browser. You may need to reenter the Identity server address in advanced options each time a new user logs in.
-
ADDITIONAL INFORMATION
Each user logging in to the MSConvert UNIFI browser will have access only to the subset of folders and projects to which they have access in UNIFI.
Do not allow all MSConvert users to log in using the UNIFI Administrator account, or any other user's account. Ensure that all MSConvert UNIFI browser users log out using the Disconnect button at the end of their session.