How to automatically email a UNIFI report as PDF or XLS - WKB78324
OBJECTIVE or GOAL
Automatically email a UNIFI report to specific users.
ENVIRONMENT
- UNIFI 1.9 (minimum)
PROCEDURE
Step 1. Define inbox subscriptions.
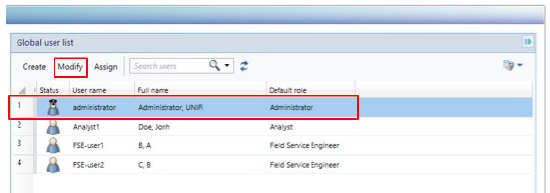
a. From Administration, select Access Management.

b. Select the desired “User name” and click “Modify”.
c. On the “Account Settings” tab, define the recipient email address for the UNIFI report.
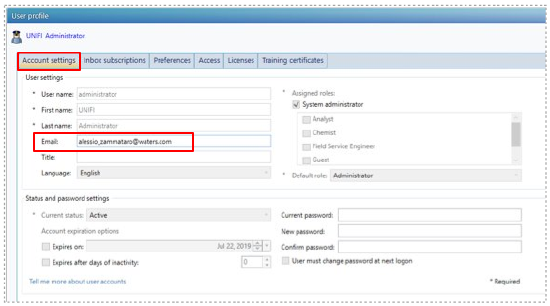
Note: the user receiving reports by email must be logged in as the user's own account to define Inbox Subscriptions. The user account must have the correct level of permissions. Consult with your system Administrator if permissions are required.
d. On the “Inbox subscriptions” tab, define the “Reporting” messaging categories as in the screenshot below:
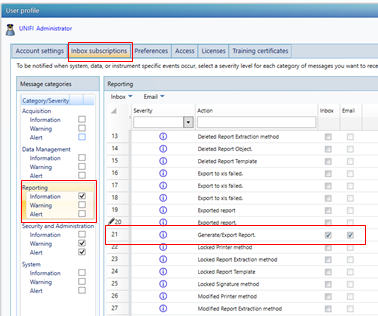
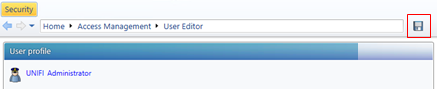
e.Save the new user account settings.
Step 2. Define the email transfer protocol (SMTP).
a. From Administration, select Global Policies.

b. Define the SMTP settings for the server that will receive the emails from UNIFI.

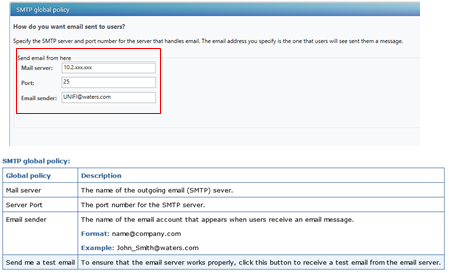
c. Click “Test” to receive a test email.
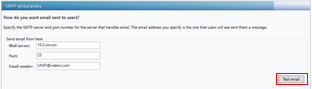
d. Save the SMTP settings

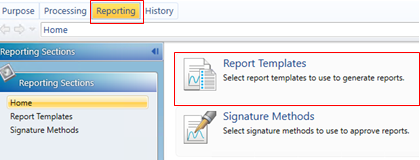
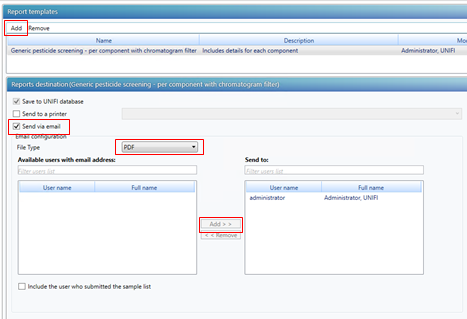
Step 3. Setup your analysis method.
a. Open the desired analysis method, select the “Reporting” tab, and click on “Report Templates”.
b.Add the desired report template; select “Send via email”; select PDF or XLS as “File Type”; “Add” the users with email addresses to the “Send to” menu.
Step 4. Launch your data acquisition.
a. When your sample list is defined, click “Start” and select all the “Post-run options” as seen in the picture below. To initiate the data acquisition, click OK.

Step 5. Send/receive the UNIFI report.
When data acquisition, processing, and report generation conclude, the report is automatically sent to the user email address.
ADDITIONAL INFORMATION
id78324, SUPUNIFI, UNIFISVR, UNIFISW18, UNIFOPT, UNIFQLIC, UNIFSW17, UNIFSW18, UNIFSW19, UNIFWGLIC, UNIFWKLIC