How to allow MassLynx through the Windows firewall - WKB50297
Article number: 50297
OBJECTIVE or GOAL
How to configure the Windows firewall to allow passage of MassLynx and ACQUITY executables.
Note: MassLynx is not supported with the Firewall turned on for the instrument network card. MassLynx communicates on a closed network - instrument LAN card to network switch box. There is no outside communication unless customer specifically allows this. The firewall to the instrument can be switched off easily and without risk. An IT department can use netstat to confirm this.
Waters does not recommend that you turn on the firewall, but sometimes a company's regulatory authority requires it.
ENVIRONMENT
- MassLynx
- ACQUITY drivers
- Windows OS
PROCEDURE
- Create two dummy executable files on the desktop with the following names: WDHCPServerSvc.exe and ACQUITYServer.exe
- Confirm that the files are displayed with the proper extensions. If not, go to Organize > Folder and search options and in the View tab clear the selection for Hide extensions for
known file types.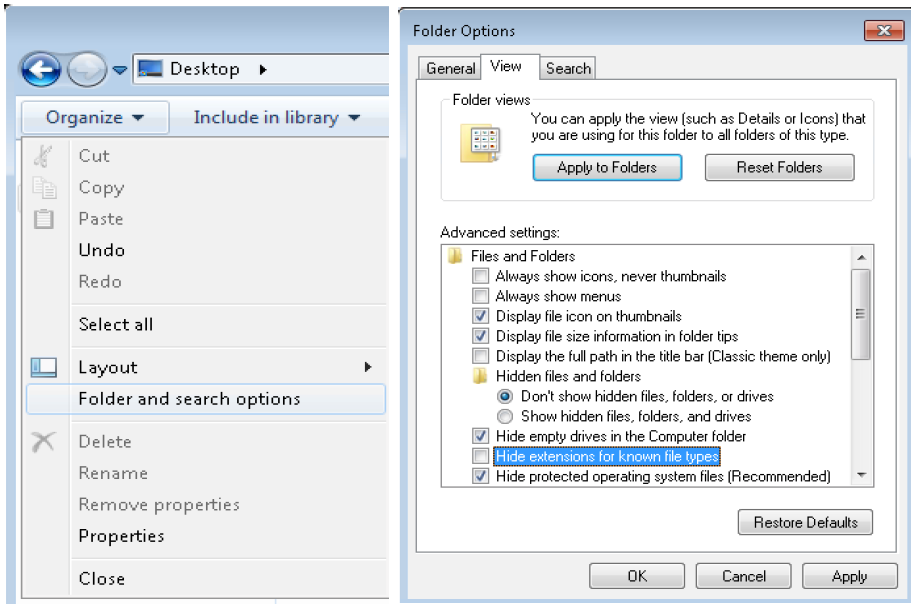
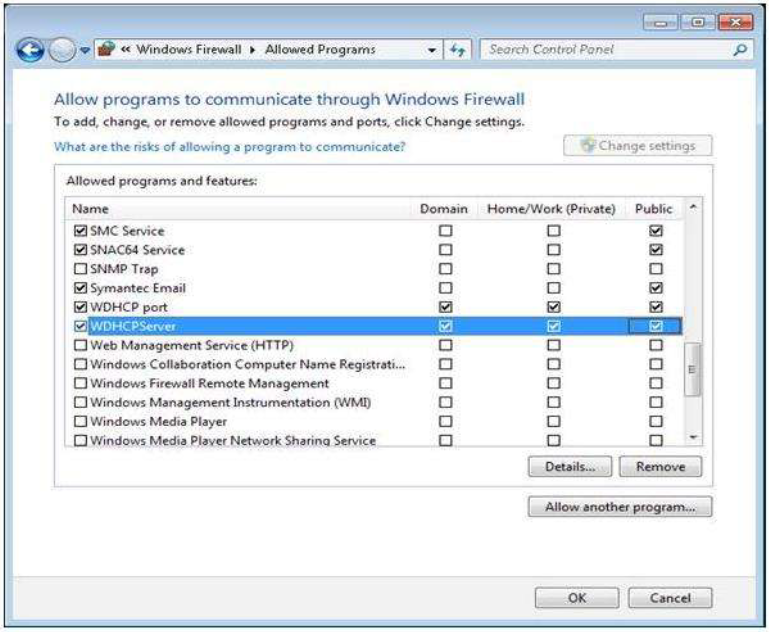
- Open Windows Firewall from Control panel. Click on the Allow a program or feature through Windows Firewall link. Press Allow another program, which
will open the Add a Program dialog box. Browse and open the ACQUITYServer.exe file from the desktop. Click Add.
- Check the Domain and Public option boxes. Repeat these steps for adding another program: WDHCPServerSvc.exe.
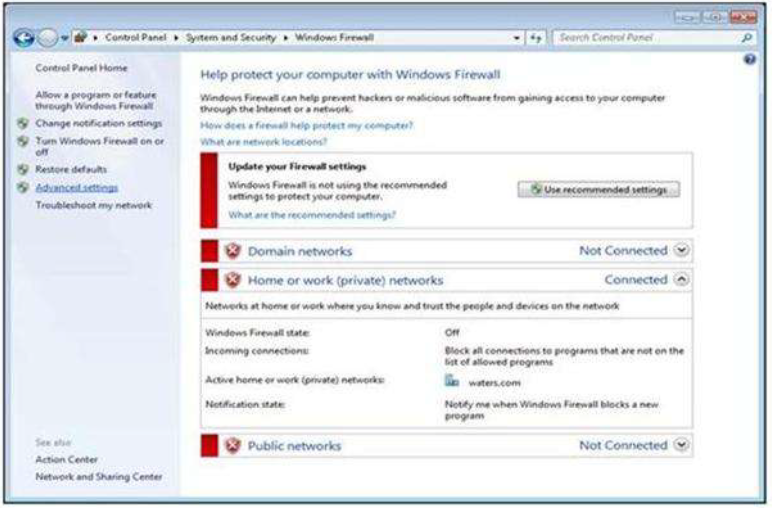
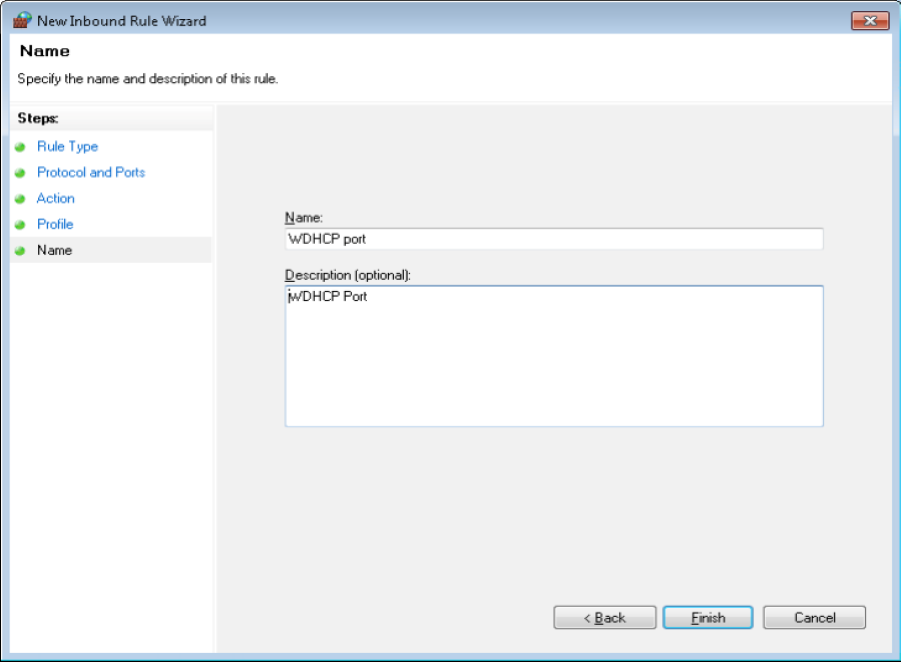
- Adding WDHCP Port: Go to Control Panel > System and Security > Windows Firewall and click on the Advanced settings link to open the Windows firewall with advanced security.
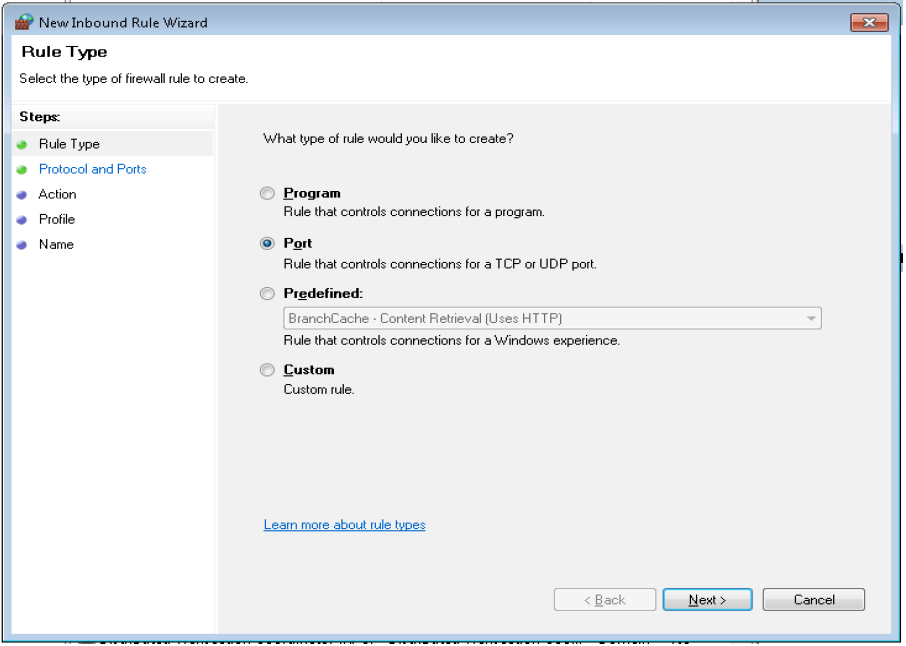
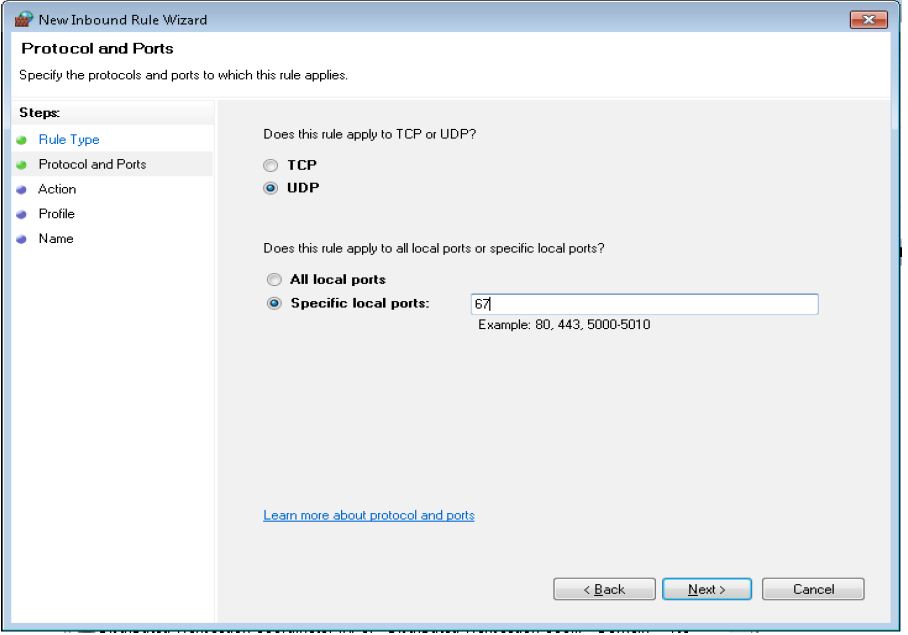
- Select Inbound Rules and click Action > New Rule to open a new inbound rule wizard. Select Rule Type as Port and click Next. In Protocol and Ports, select UDP
option, Specific local ports, specify 67, and click Next.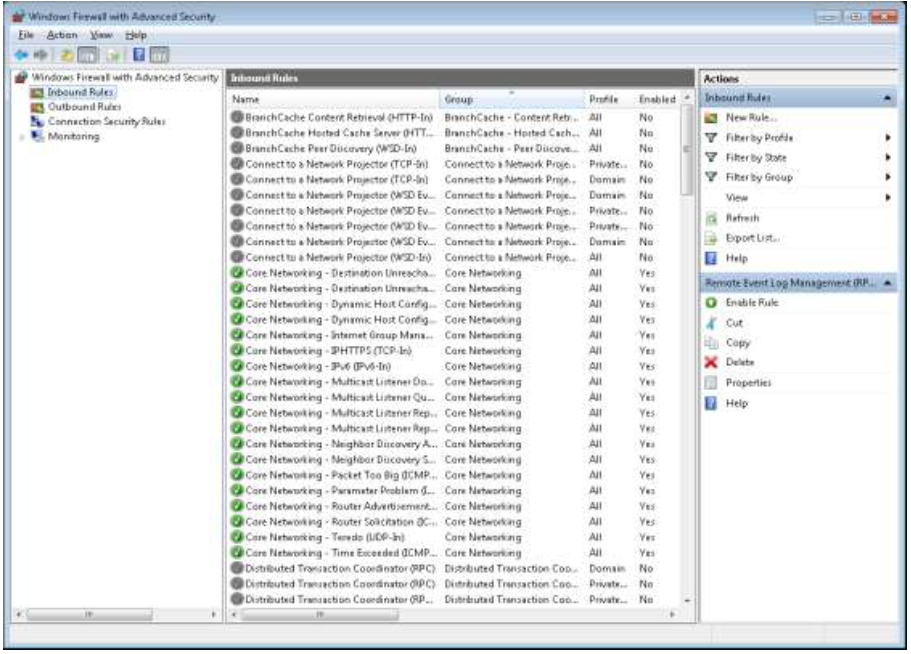
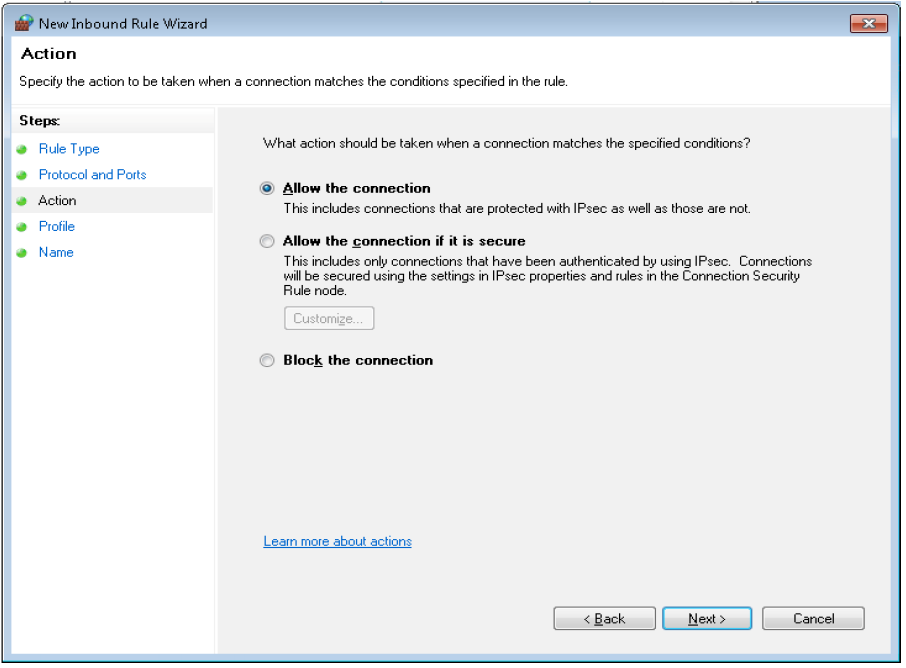
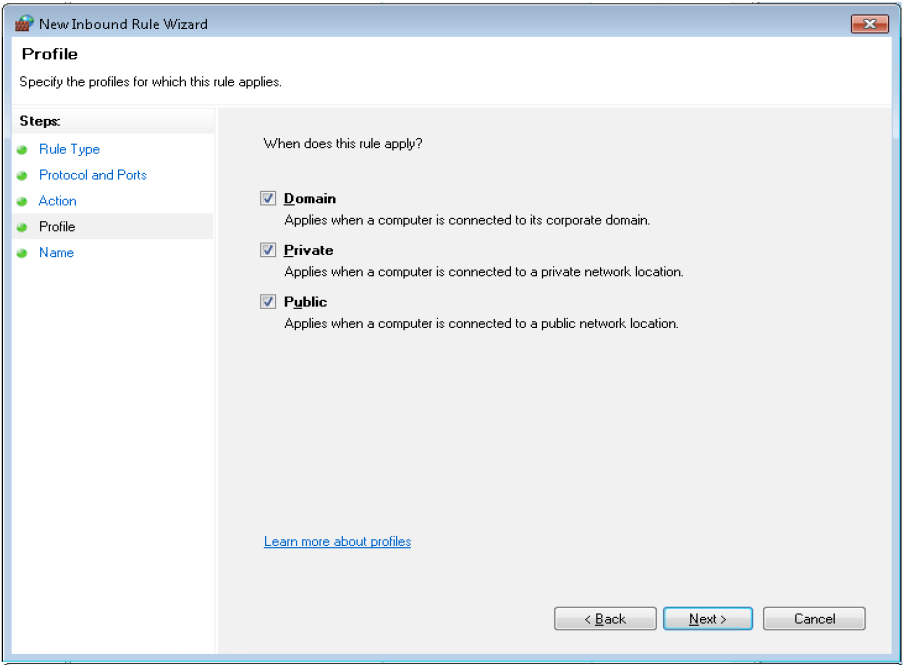
- In the Action page, select Allow the connection and click Next. Select all of the options (Domain, Private and Public) in the Profile page and click Next.
- Finally, provide the Name and Description of the new inbound rule and click Finish.
ADDITIONAL INFORMATION