Dissolution Option in Empower - Tip341
OBJECTIVE or GOAL
Use the Sample Set Method Wizard to create a sample set method.
ENVIRONMENT
- Empower
- Empower Tip of the Week #341
PROCEDURE
STEP 1
You can create a new sample set method either from the Methods tab in the project window or from the Run Samples window (Figure 1).

STEP 2
When the wizard launches, select the "Create a Sample Set Method using this wizard" radio button and click Next (Figure 2).

STEP 3
On the Select Sample Set Method Type screen, select LC and the No Dissolution radio button for this example. Click Next (Figure 3).

STEP 4
On the Select Location of Standards screen, you have several options for where the standard injections will occur in the sample set. When you select an option, the picture on the left changes. For example, if you select At Start of Sample Set, the first flag turns into a calibration curve. Additionally, you must select what position the first standard vial occupies in the autosampler (Figure 4).

STEP 5
Another example is "Throughout sample set (average all)". In this case, the calibration curve is based on all the standards run throughout the sample set. Consult the Empower online Help for further information on the selections on this screen. Click Next (Figure 5).

STEP 6
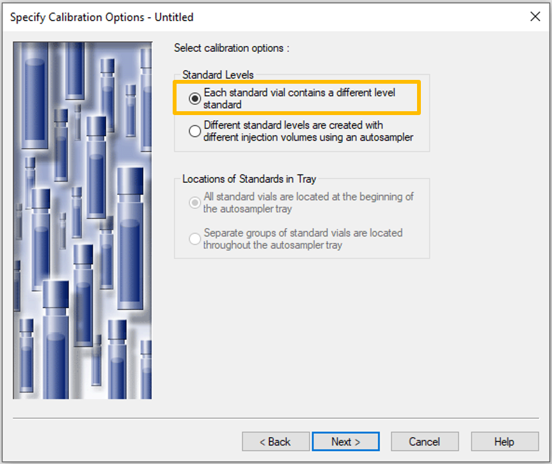
On the Specify Calibration Options screen, select whether each standard vial will contain a different amount of analyte (first option) or if different levels will be created by varying the injection volume of a stock solution (second option). For Location of Standards in Tray, this depends on the selection made in the previous screen. If you select At Start of Sample Set (as in Figure 4), the Location of Standards in Tray is not available because all standards are at the beginning. If you select one of the other choices, you can then select where the vials containing standards are located (Figure 6). Click Next.
STEP 7
On the Describe Standard Bracket screen, you specify the number of standard vials, the number of injections per vial, Injection volume, Run time, and Method Set (Figure 7). "Number of levels in each standard group" is available if you selected "Different standard levels are created with different injection volumes using an autosampler" as in Figure 6. Otherwise, this is not available.

STEP 8
If you click Options, you can define Sample Weight, Dilution, Data start, and Next injection delay (Figure 8). Click Next.

STEP 9
On the Describe Samples screen, you specify the number of sample vials, the number of injections per vial, Injection volume, Run time, and Method Set. Once again, the Options button allows you to define Sample Weight, Dilution, Data start, and Next injection delay (Figure 9).

STEP 10
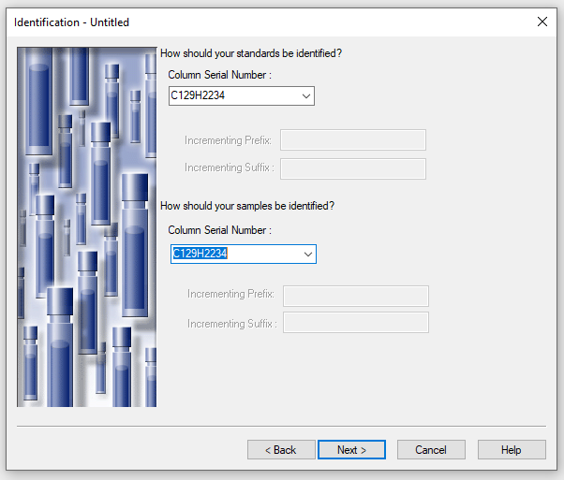
Depending on the number of sample custom fields in the project, you will be prompted to specify the appropriate information in the Identification screens. For example, the screens in Figure 10, Figure 11, and Figure 12 allow you to specify a chromatographic column name, column serial number, and Sample Matrix (used in some applications).


STEP 11
Among the Identification screens, the SampleName prompts you for a root name for the standards that can then be incremented with a prefix or suffix. Likewise, you can specify a root name for the samples that can be incremented with a prefix or suffix. Click Next (Figure 13).

STEP 12
On the Describe Runtime Options screen, select the Run Mode and specify the Interactive System Suitability mode. Click Next (Figure 14).

STEP 13
On the Summary screen, we see a summary at the top. This is based on the information we specified on each screen of the wizard. There is an option to display the Component Editor after completing the wizard and an Options button (Figure 15).

STEP 14
If you click Options, you can add additional lines to the Sample Set Method such as Equilibrate lines, and so forth. These additional lines can be added to the Beginning of Sample Set, End of Sample Group, End of Standard Group, or End of Sample Set (Figure 16).

STEP 15
When you click Finish, the completed Sample Set Method appears with the Component Editor in the foreground. Specify any necessary information in the Component Editor and click OK (Figure 17).

STEP 16
To save the sample set method from the Project window, select File > Save As. To save the sample set method from the Run Samples window, select File > Save Sample Set Method As… (Figure 18).

ADDITIONAL INFORMATION
This can be done via the Pro or QuickStart interface.