Validation Protocols: Setting up the System Precision Test - Tip192
Article number: 112986
OBJECTIVE or GOAL
Get Empowered: Method Validation Manager
Tip #192: Validation Protocols: Setting up the System Precision Test
The previous tip (Tip #191) continued the discussion on Validation Protocols and how to set up the Accuracy Test.
This tip continues the discussion on Validation Protocols and how to set up the System Precision test. The System Precision Test determines whether the ‘chromatographic system’ is valid (NOTE: As mentioned previously, you should follow your own SOP, this is only an example).
ENVIRONMENT
- Empower
PROCEDURE
- Click the ‘System Precision’ tab in the Validation Protocol.
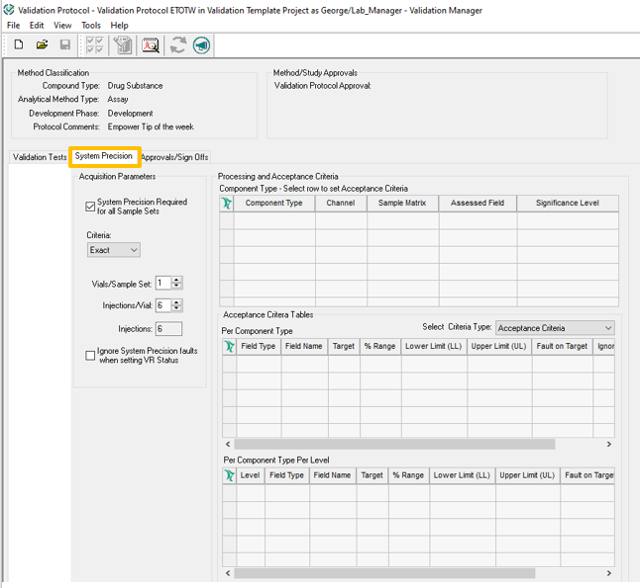
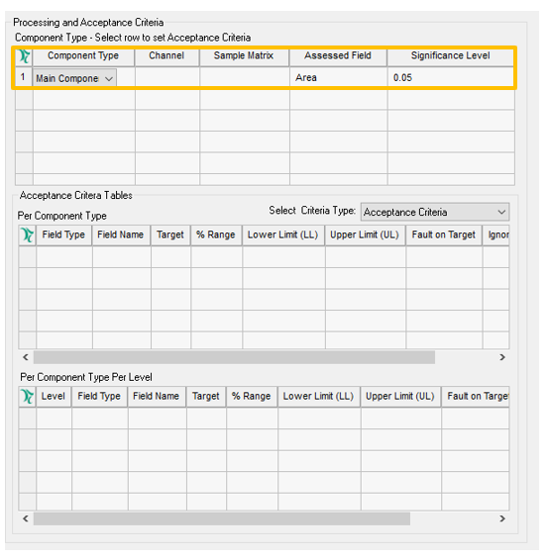
- In the ‘Component Type’ table, select the field(s) that you want evaluated for system precision. Select the ‘Component Type’, from the ‘Component Type’ field. Then select the field of interest, from the ‘Assessed Field’.
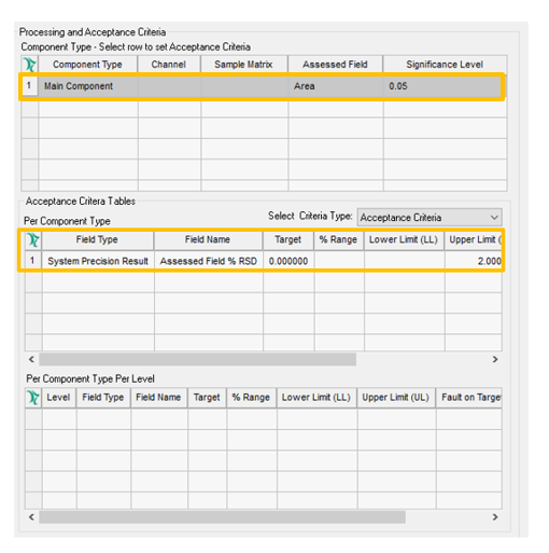
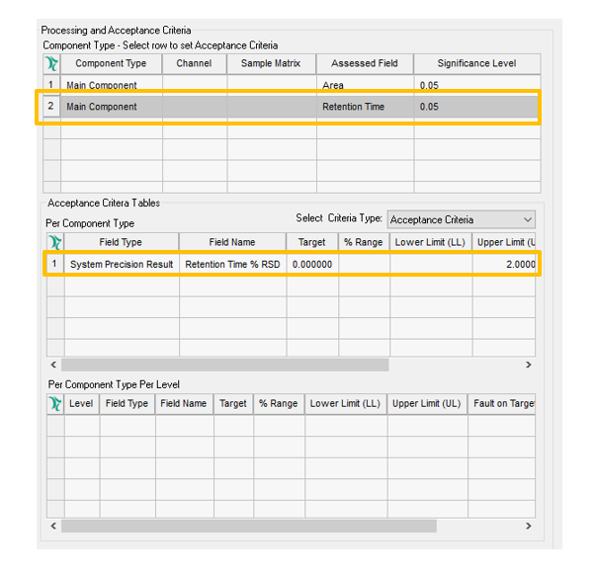
- In the ‘Per Component Type’ table, select how the selected field will be evaluated. Highlight the row in the Component Type table created in Step 2. In the ‘Per Component Type’ table, select the ‘Field Type’ and enter an appropriate Target value and limits.
- If you have more than one Assessed field, repeat Steps 2 and 3.
- The Sample Set Method specifies which injections should be used for all tests, including the System Precision Test.

ADDITIONAL INFORMATION
Final Note: Please use the Pro interface when working with the Method Validation Manager option.