How to enable/disable fast user switching in Windows 10 - WKB47366
Article number: 47366
OBJECTIVE or GOAL
Enable or disable fast user switching in Windows 10.
ENVIRONMENT
- Windows 10
PROCEDURE
OPTION 1 _ GROUP POLICY
- Hold the Windows key and press “R” to bring up the Run dialog box.
- Type “gpedit.msc”, and then press “Enter".
- The Local Group Policy Editor appears. Expand the following:
Local computer policy
Computer configuration
Administrative Templates
System
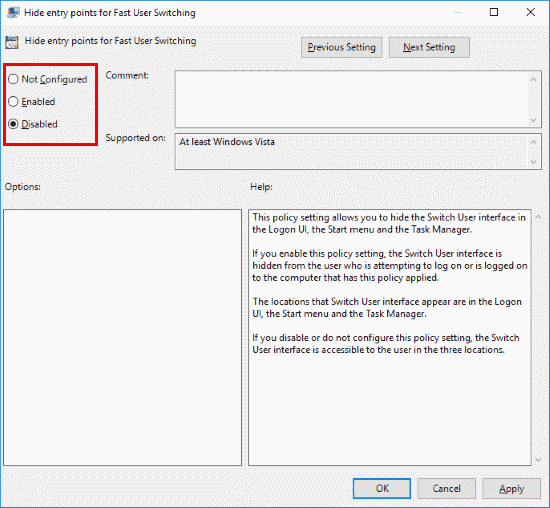
Logon - Open “Hide Entry Points for Fast User Switching“.
- Select “Enabled” to turn Fast User Switching off. Set it to “Disable” to turn it on.
OPTION 2 _ REGISTRY
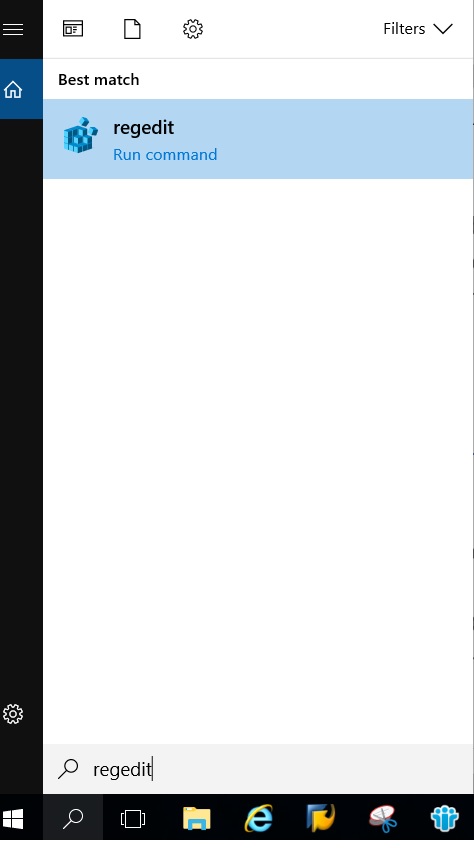
- Hold the Windows key and press “R” to bring up the Run dialog box.
- Type “regedit”, and then press “Enter“.
- Expand the following:
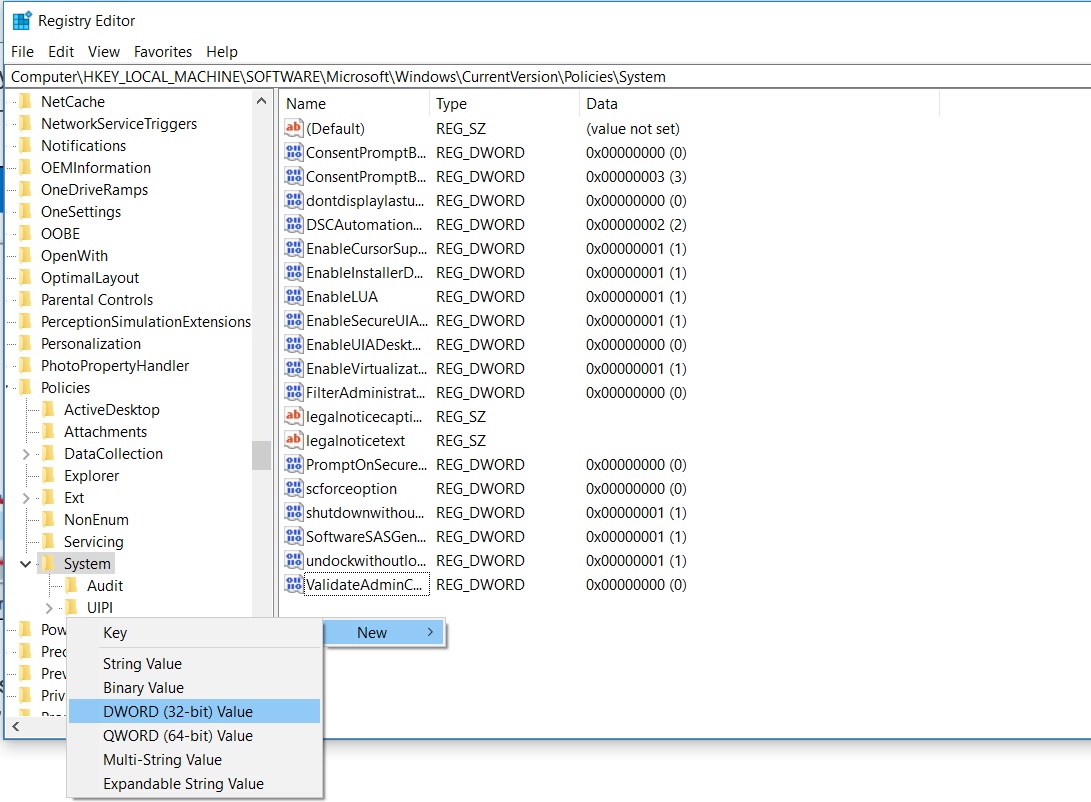
HKEY_LOCAL_MACHINE
SOFTWARE
Microsoft
Windows
CurrentVersion
Policies
System - Look for a value called “HideFastUserSwitching“. If it does not exist, right-click the “System” folder, select “New DWORD 32-bit value“, and then type the name “HideFastUserSwitching“. Press “Enter” to create the value.
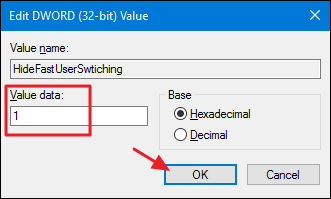
- Double-click “HideFastUserSwitching“. Change the “Value data” to “1” to disable Fast User Switching; set it to “0” to enable it.
ADDITIONAL INFORMATION