How to manually calibrate the ToF using column bleed ions on APGC - WKB8446
Article number: 8446
OBJECTIVE or GOAL
Use naturally eluting background peaks to provide a calibration for APGC. (The peaks used are column bleed (siloxane) peaks with a plasticizer peak added as a low mass calibrant.)
ENVIRONMENT
- APGC
- MassLynx
- SYNAPT G2
- Xevo G2-XS
- Xevo G2-S
PROCEDURE
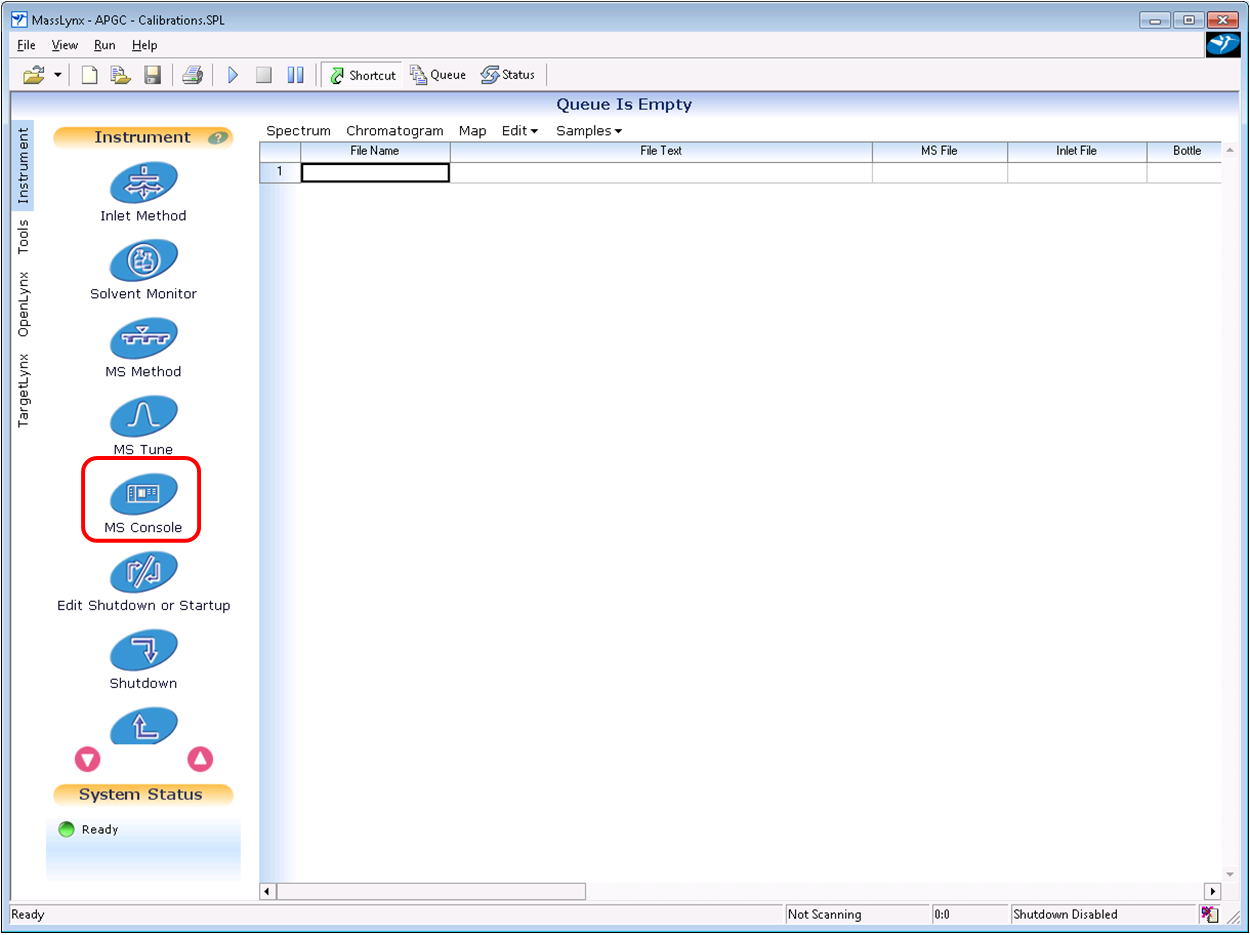
- Open up the MS Console.
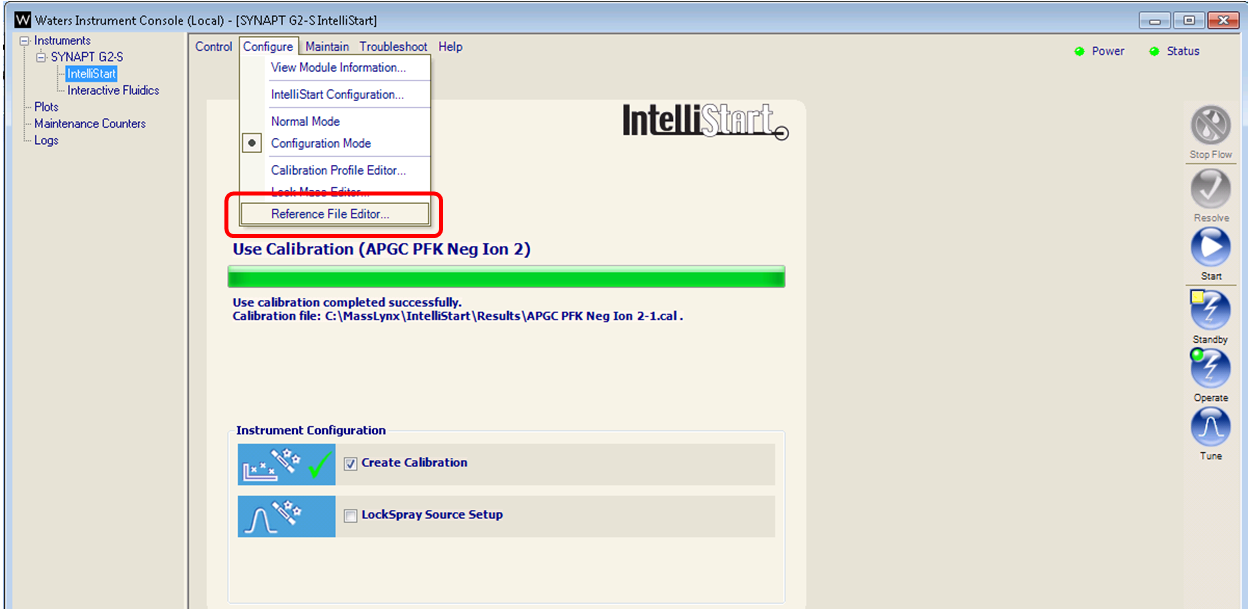
- Browse to IntelliStart, and then select Configure / Reference File Editor.
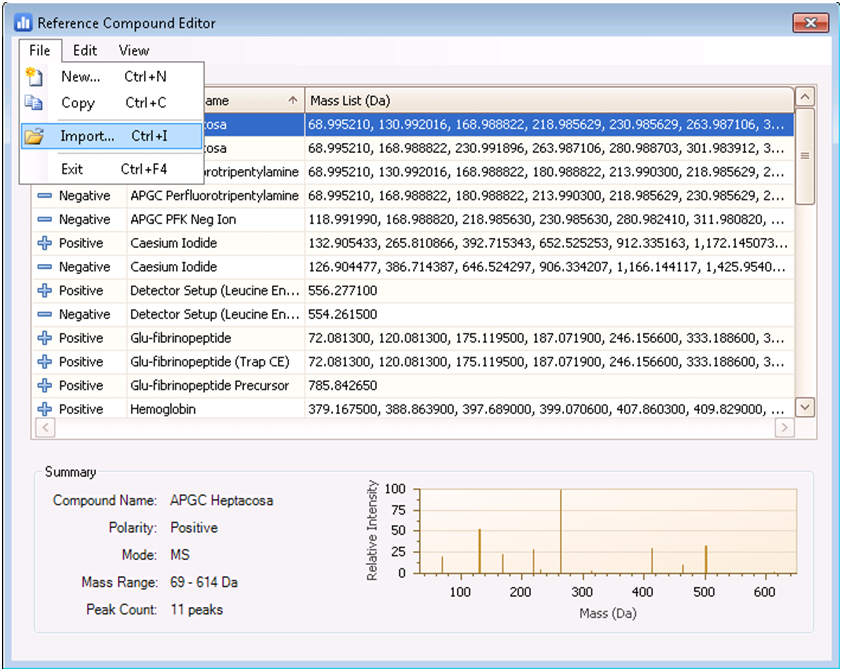
- Select File > Import.
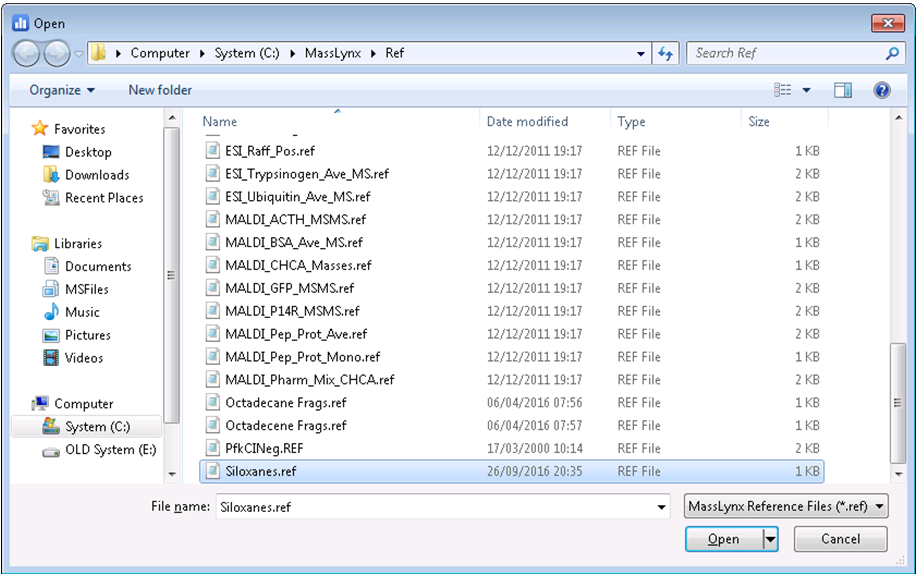
- Select the Siloxane.ref file. See Additional Information if this file is not present.
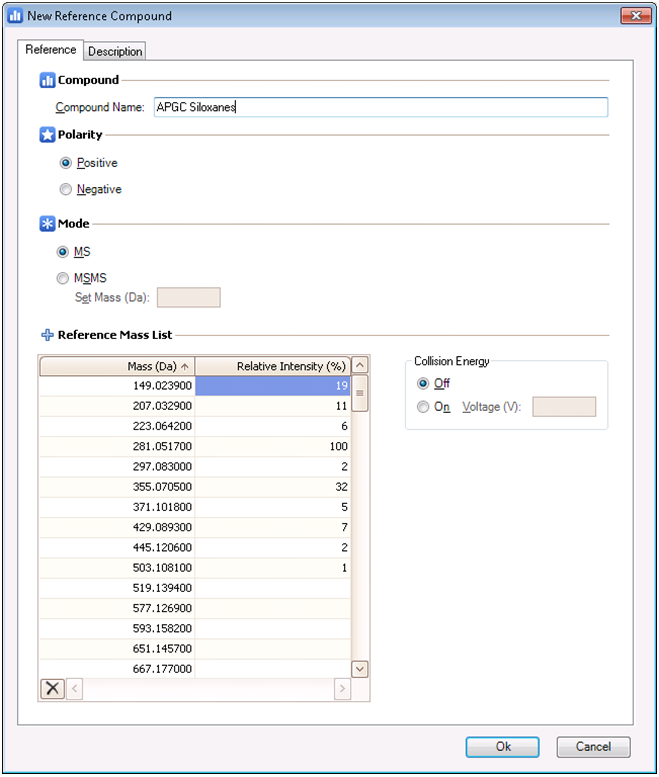
- Fill out the new reference compound information as shown below, ensuring that the polarity selected is positive.
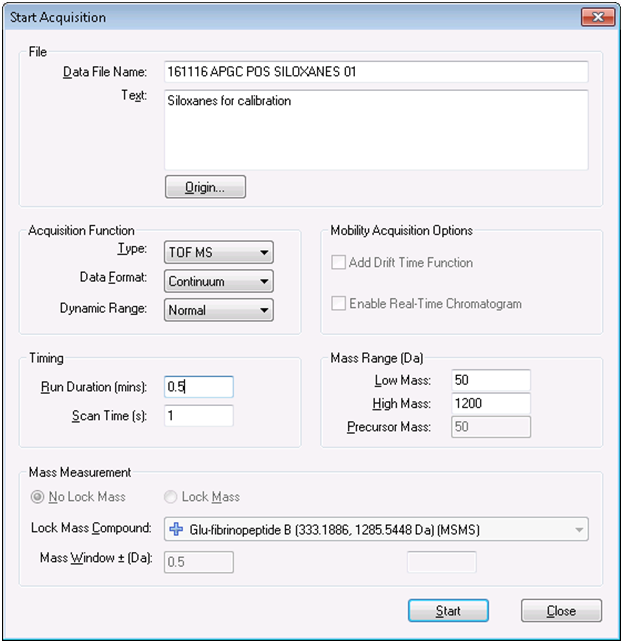
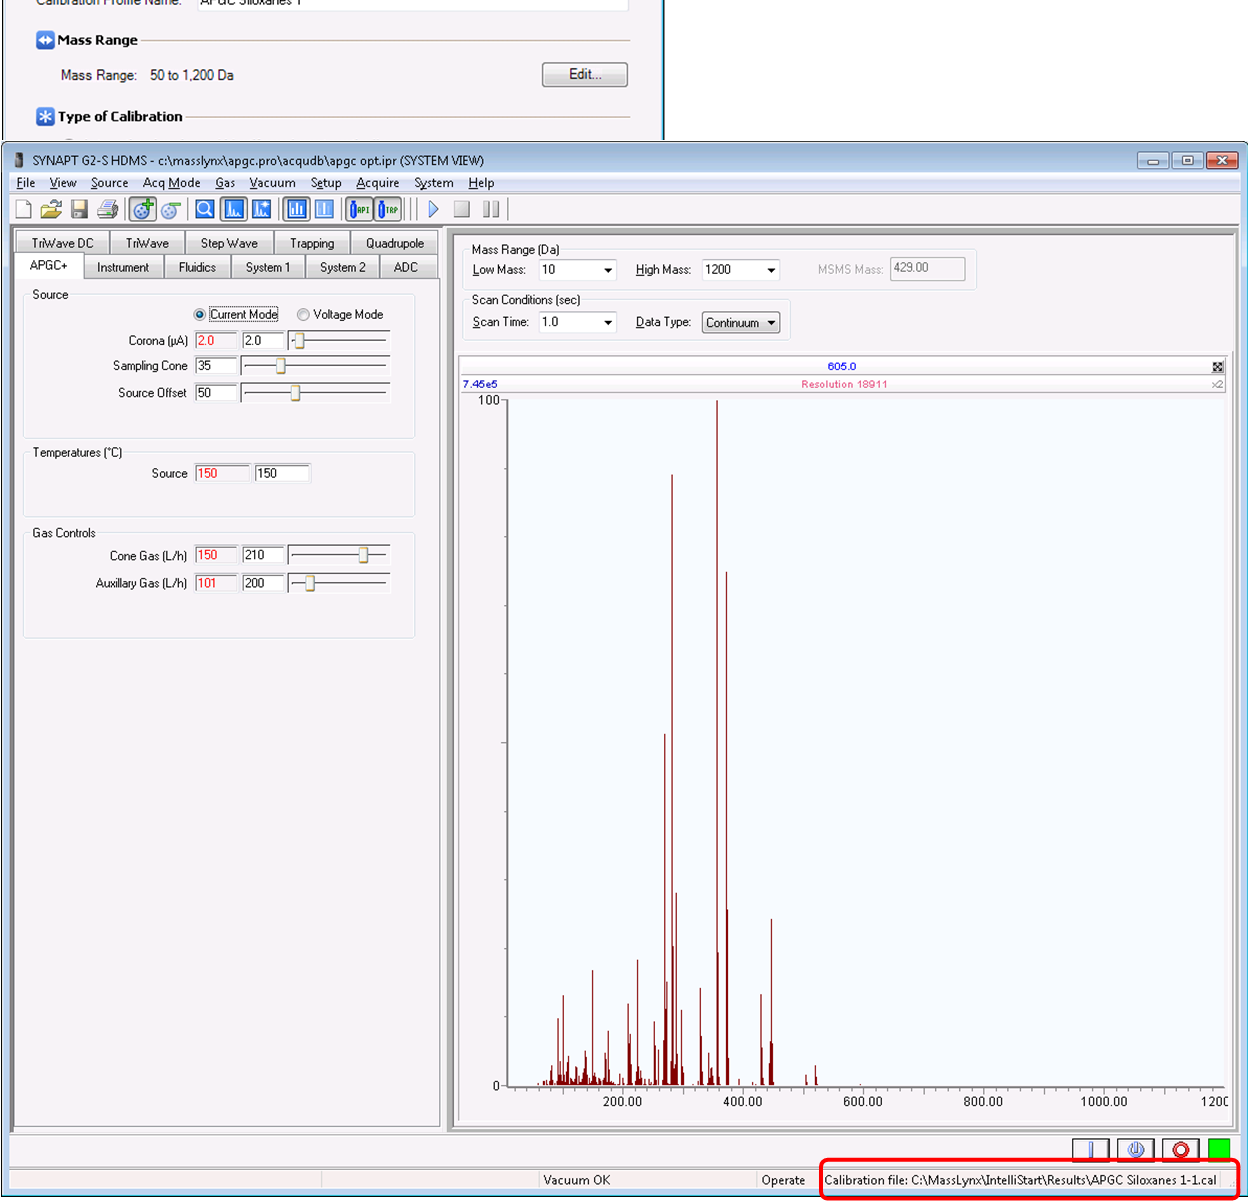
- Run a tune page acquisition to get siloxane data under current conditions. Note that the data format must be continuum and the mass range must be the same as the calibration profile that will be created later (50 to 1200 Da is a good general range). The instrument mode (i.e., Sensitivity, Resolution, or High Resolution) musst also match. If calibration points at higher masses (>~600 Da) are required, turning the GC oven temperature up can help get higher-mass siloxanes into the source.
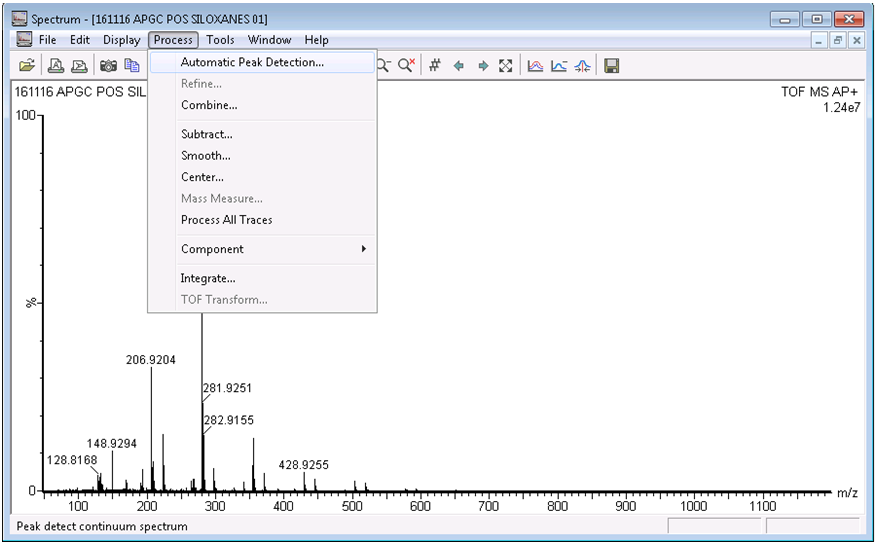
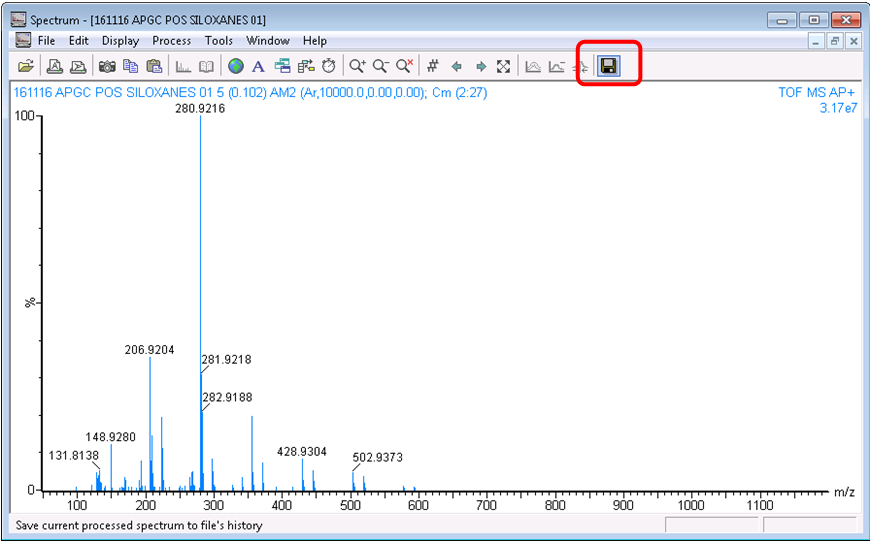
- Open a chromatogram of the data acquired and, with a right-click drag, combine the entire set of data to a single spectrum.

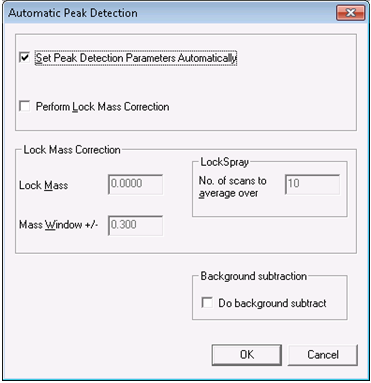
- In the spectrum window, select Process > Automatic Peak Detection. Use the automatic parameter selection when prompted, and press OK.
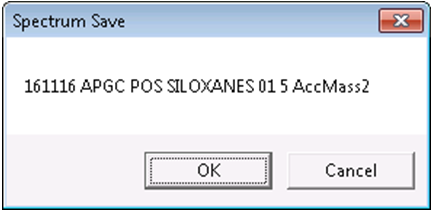
- Once the peak detection process has run, click the save button on the right-hand side of the toolbar, and click OK when prompted.
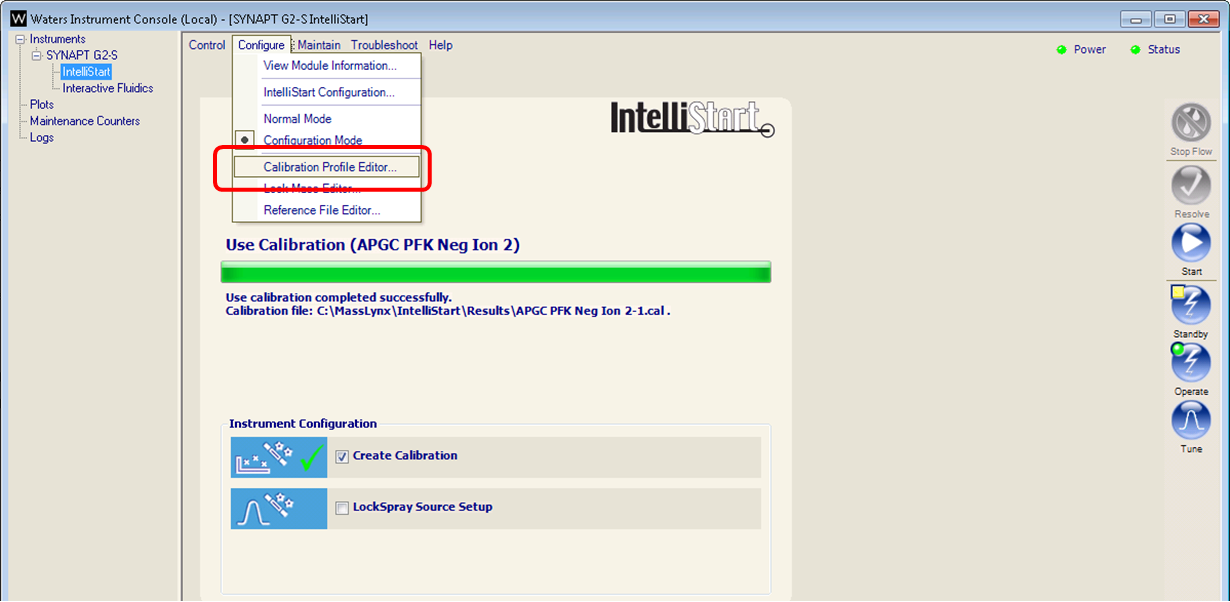
- Return to the MS Console and select Calibration Profile Editor from the Configure menu.
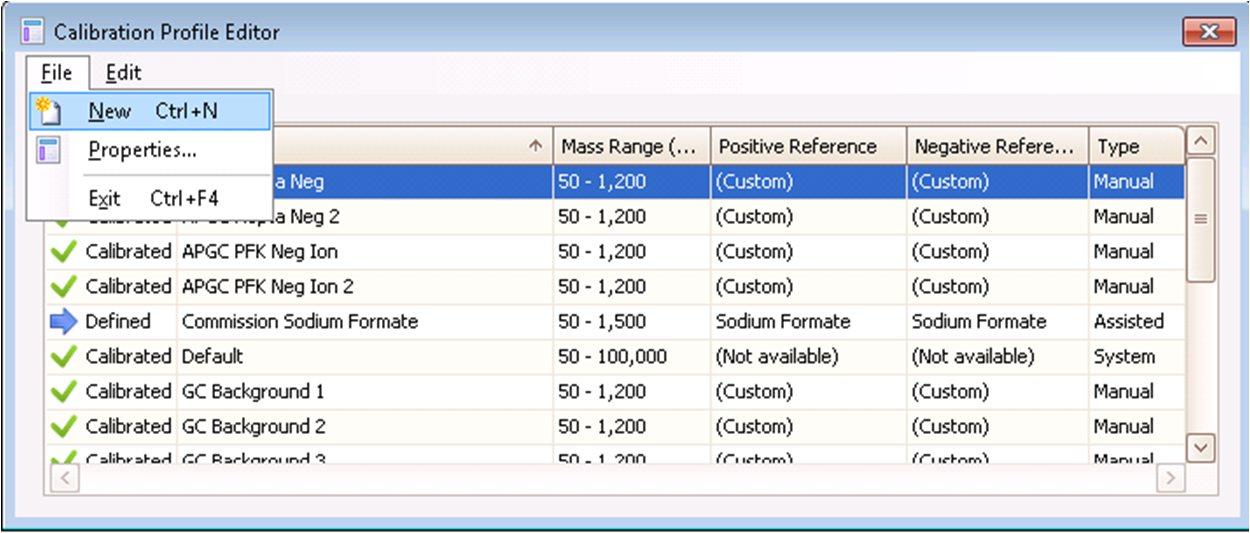
- Select File > New from the calibration profile editor.
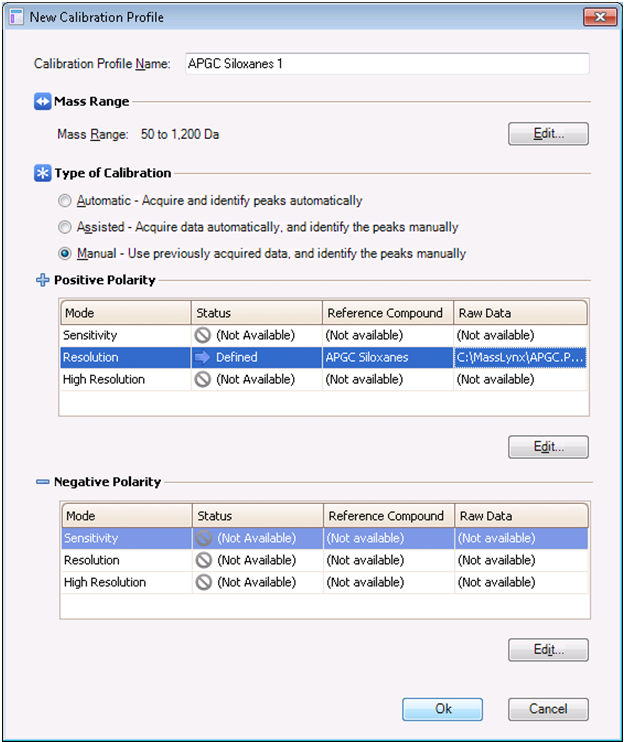
- Fill out the details for the calibration profile as shown below, setting the mass range as before and selecting manual calibration. Under positive polarity, select the reference compound from the drop-down menu for the mode in which the data were acquired (“Resolution” in the example below).

- In the adjacent Raw Data box, click the browse button and select the data from step 6.
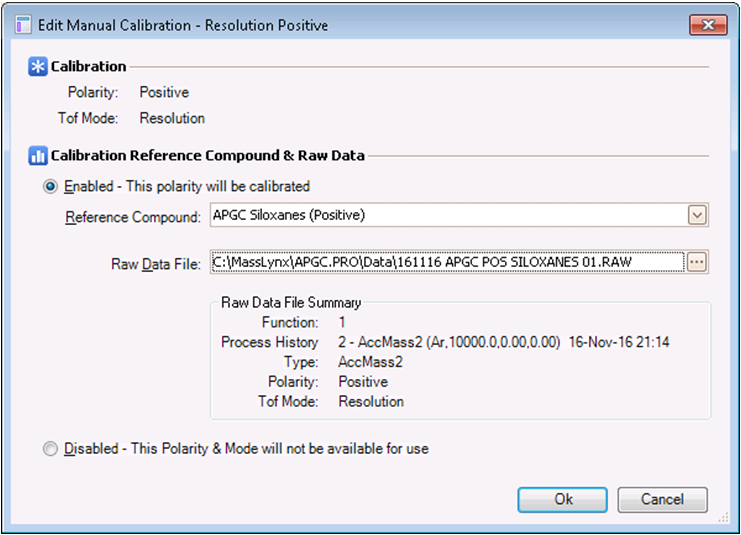
- The calibration profile should appear as below. Select OK when done.
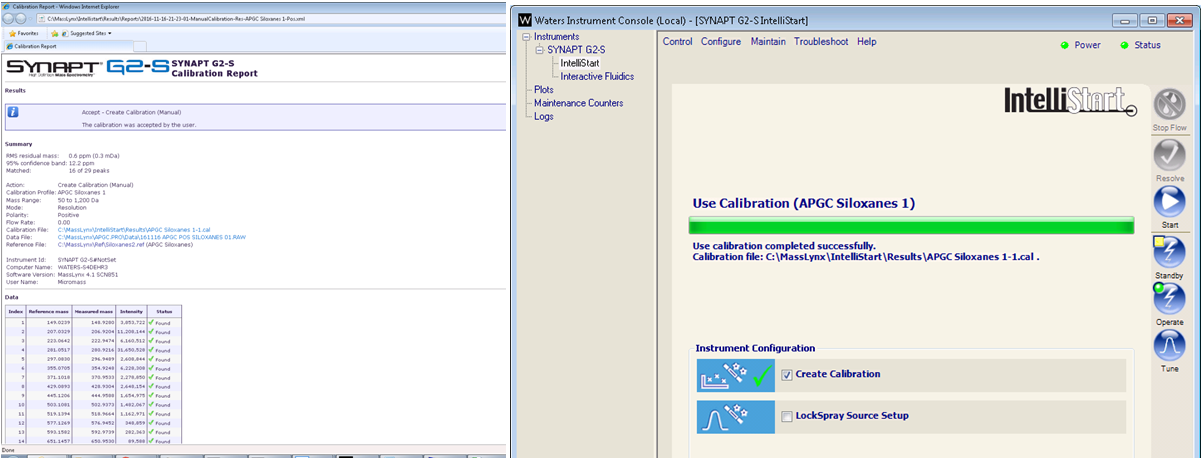
- Returning to the MS Console page, select the Create Calibration check box and click Start.
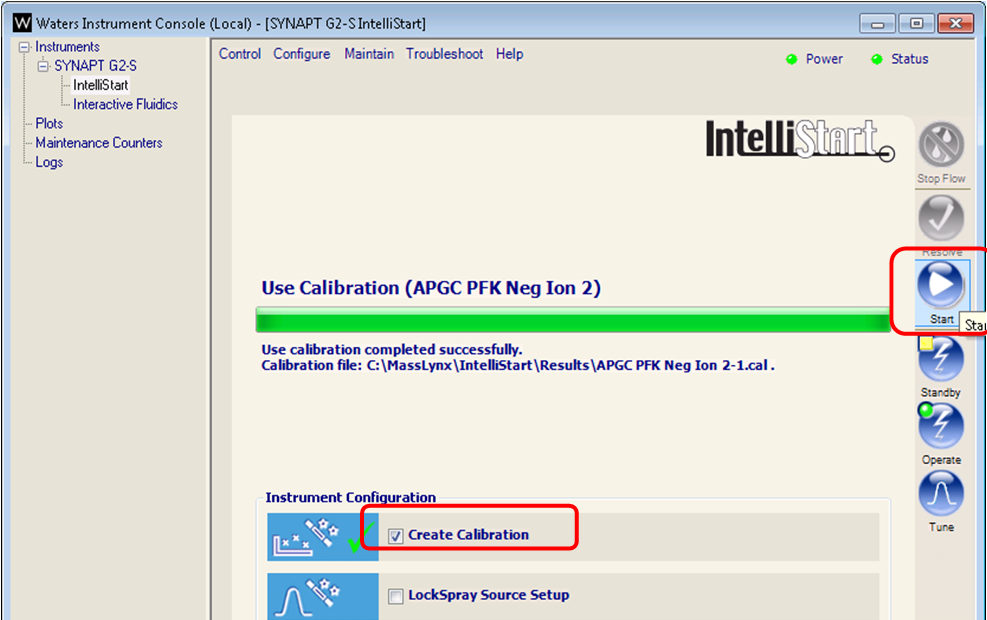
- Proceed through the following screens as shown, selecting the calibration profile just created.


- Manually calibrate the spectrum and click the green check mark in the top-left corner when satisfied.
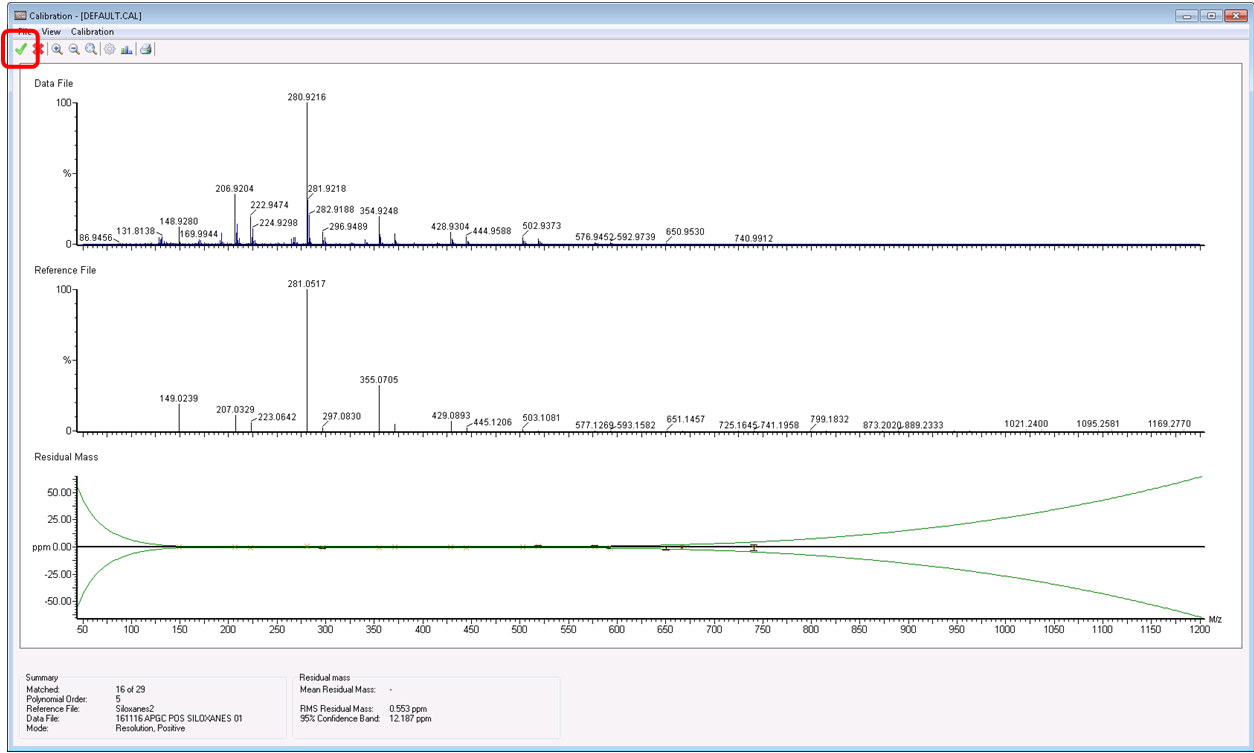
- A calibration report should appear and the MS Console should report that the calibration was successful. Also, the active calibration should now appear in the bottom right-hand side of the tune page.
ADDITIONAL INFORMATION
The siloxane calibrant is attached below.
id8446, APGC, MLYNX, MLYNXV41, SUPMM, SYNG2HD, SYNG2HDMAL, SYNG2MS, SYNG2MSMAL, XEVOG2SQTF, XEVOG2STOF, XEVOG2XSTF