How to disassemble an ACQUITY UPLC Sample Manager - WKB244340
Article number: 244340
OBJECTIVE or GOAL
Shut down and disassemble an ACQUITY UPLC Sample Manager for shipment to the repair center.
ENVIRONMENT
- ACQUITY UPLC Sample Manager
PROCEDURE
- Wash the system with H2O for 20 minutes, and then wash the system with IPA for 20 minutes.
- Close the control software and power-off all modules on the stack.
- Electrically unplug all UPLC modules and mark and remove any cables (Ethernet, signal, I/O, events) from the modules.
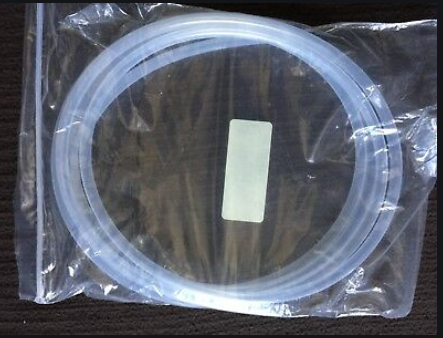
- Remove the sample plates from from the sample manager and remove the solvent filters from the solvent bottle and place them in a plastic bag (as shown below).
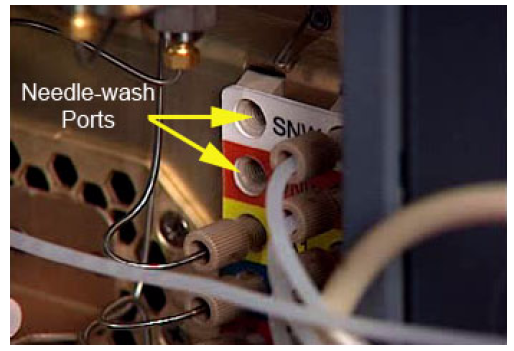
- Remove the wash lines of the Sample Manager from their respective degasser ports on the BSM.
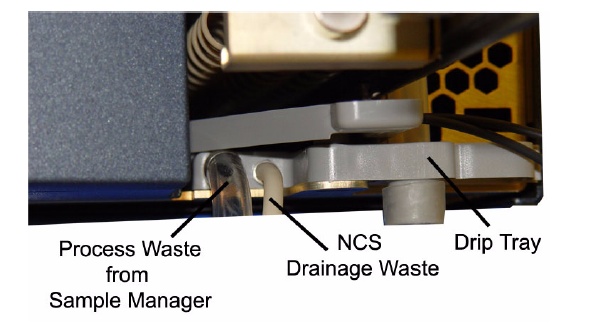
- Locate and disconnect the Tygon tubing from the process waste port, and the PharMed tubing from the needle-clean system waste port (found on the lower drip tray of the sample manager, figure below).
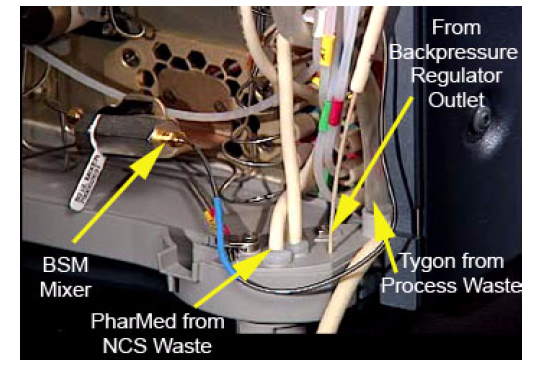
- Disonnect the PharMed tubing from the front barbed fitting and the Tygon tubing from the front boss fitting, both located on the lower BSM drip tray (figure below - Tygon and PharMed tubings must be shipped with the Sample Manager).
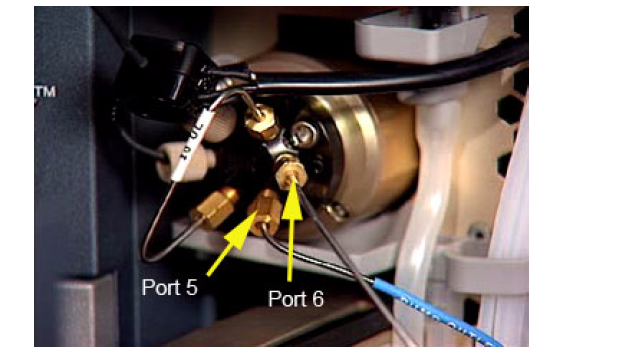
- Disconnect the pump outlet tubing and the column outlet tubing from injection valve ports 5 and 6.
- Move the module to a suitable box for shipment. (If a box is not available, ask your local Waters office.)
Note the dimensions and weight of the module to choose the appropriate box: 34.3 cm x 71.2 cm x 32.4 cm, 25.0 kg -
Fill and sign the latest revision of H&S module provided by Waters.
-
Attach it to the box and send a PDF copy to the local Waters office.
-
The Waters office will contact you to arrange the shipment.
ADDITIONAL INFORMATION
To reinstall the module, attach all of the cables and tubes that were removed.